CloudBees CI - Pipeline Template Catalogs
Import Pipeline Template Catalog
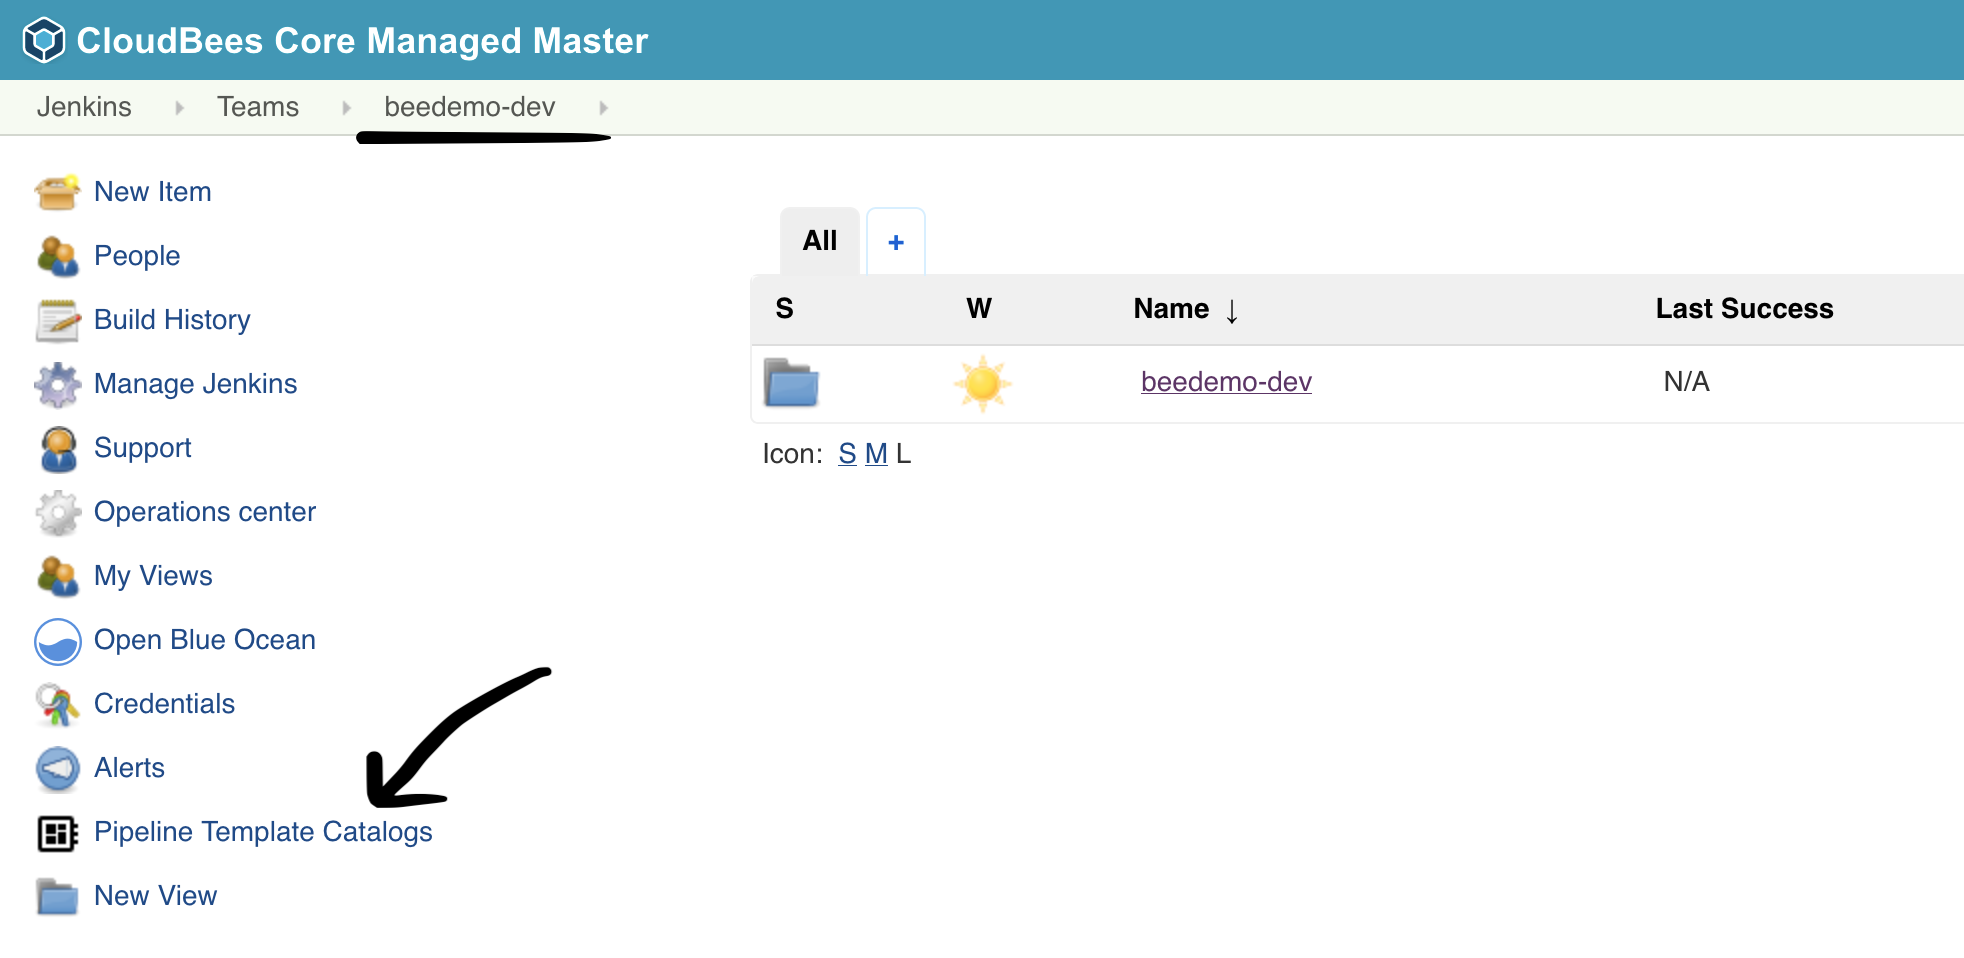
- Navigate to the top-level of your Team Master and click on Pipeline Template Catalogs in the left menu
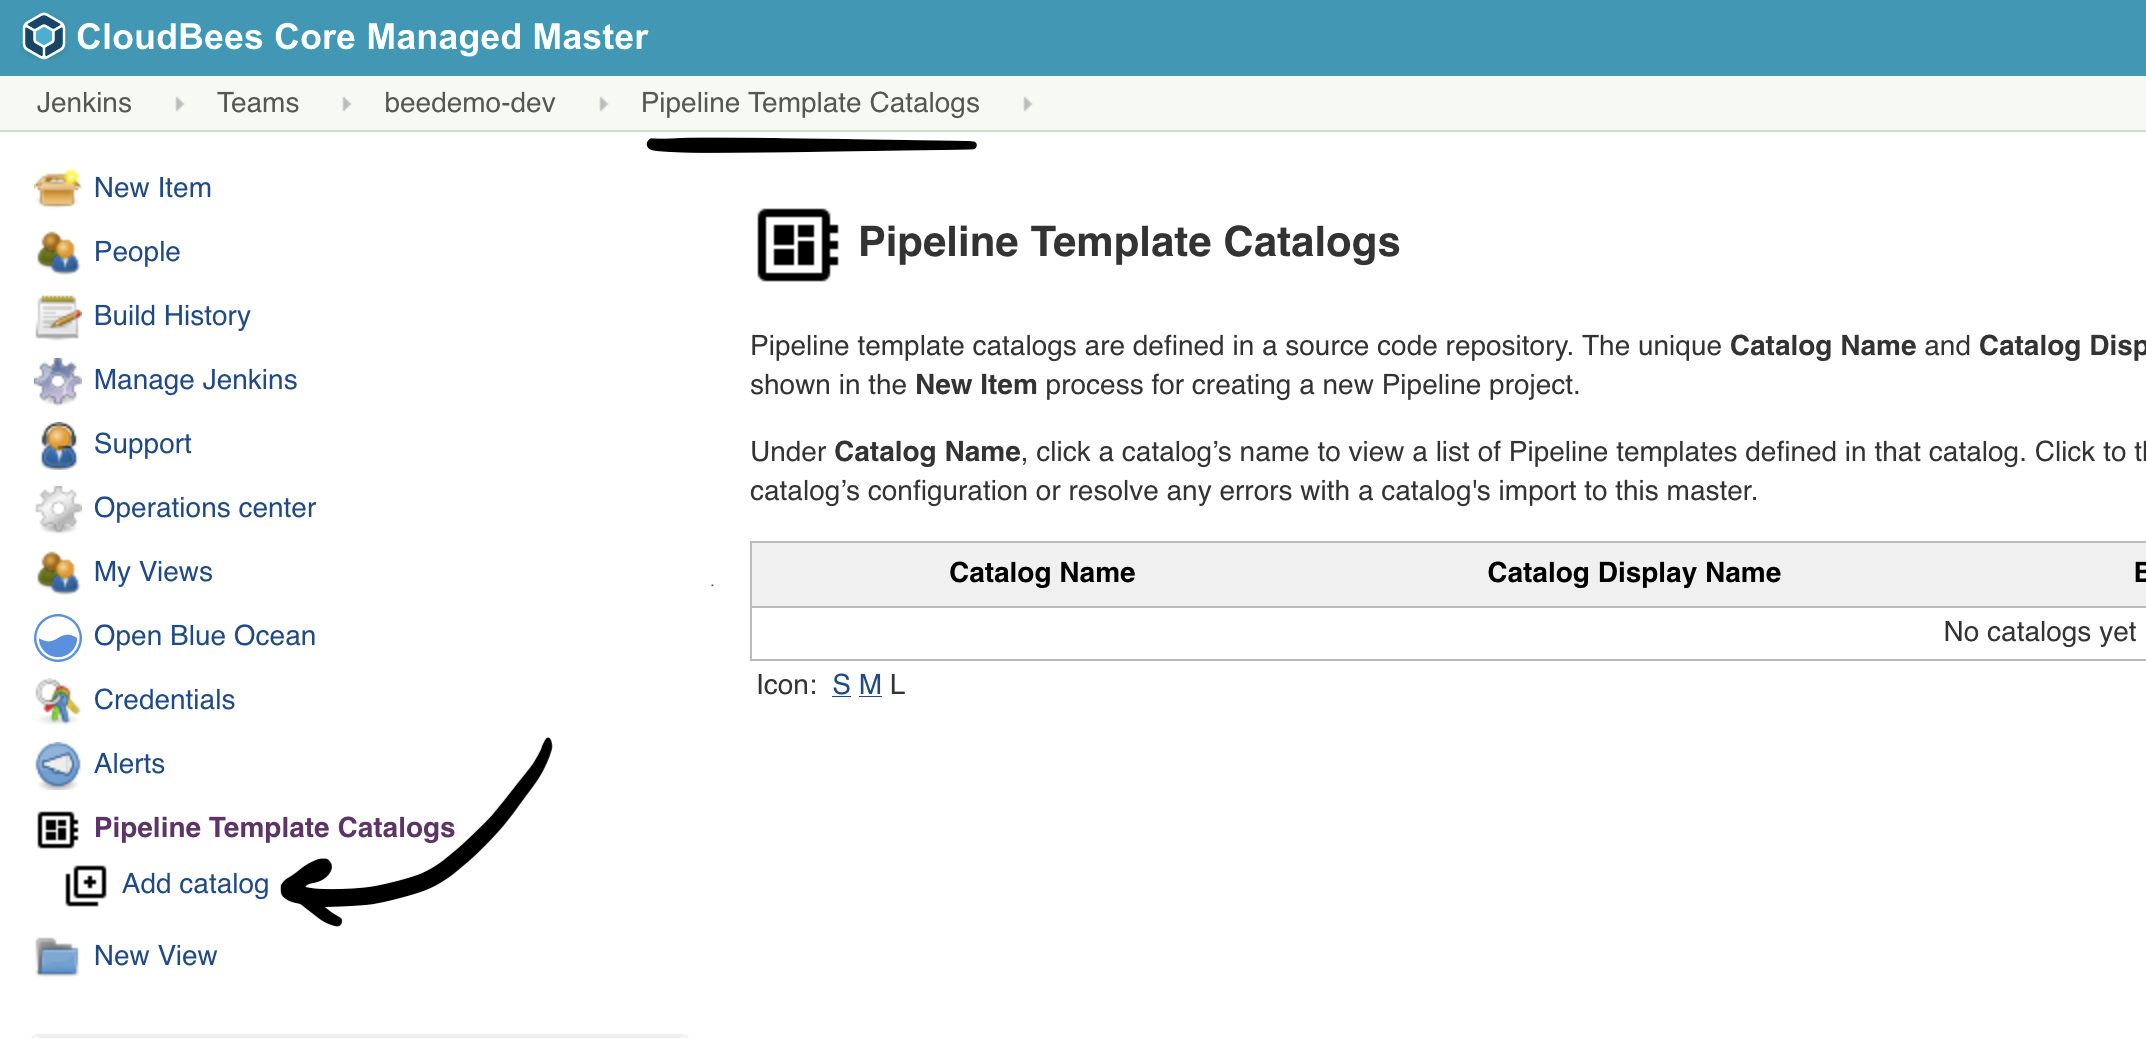
- Click on Add catalog
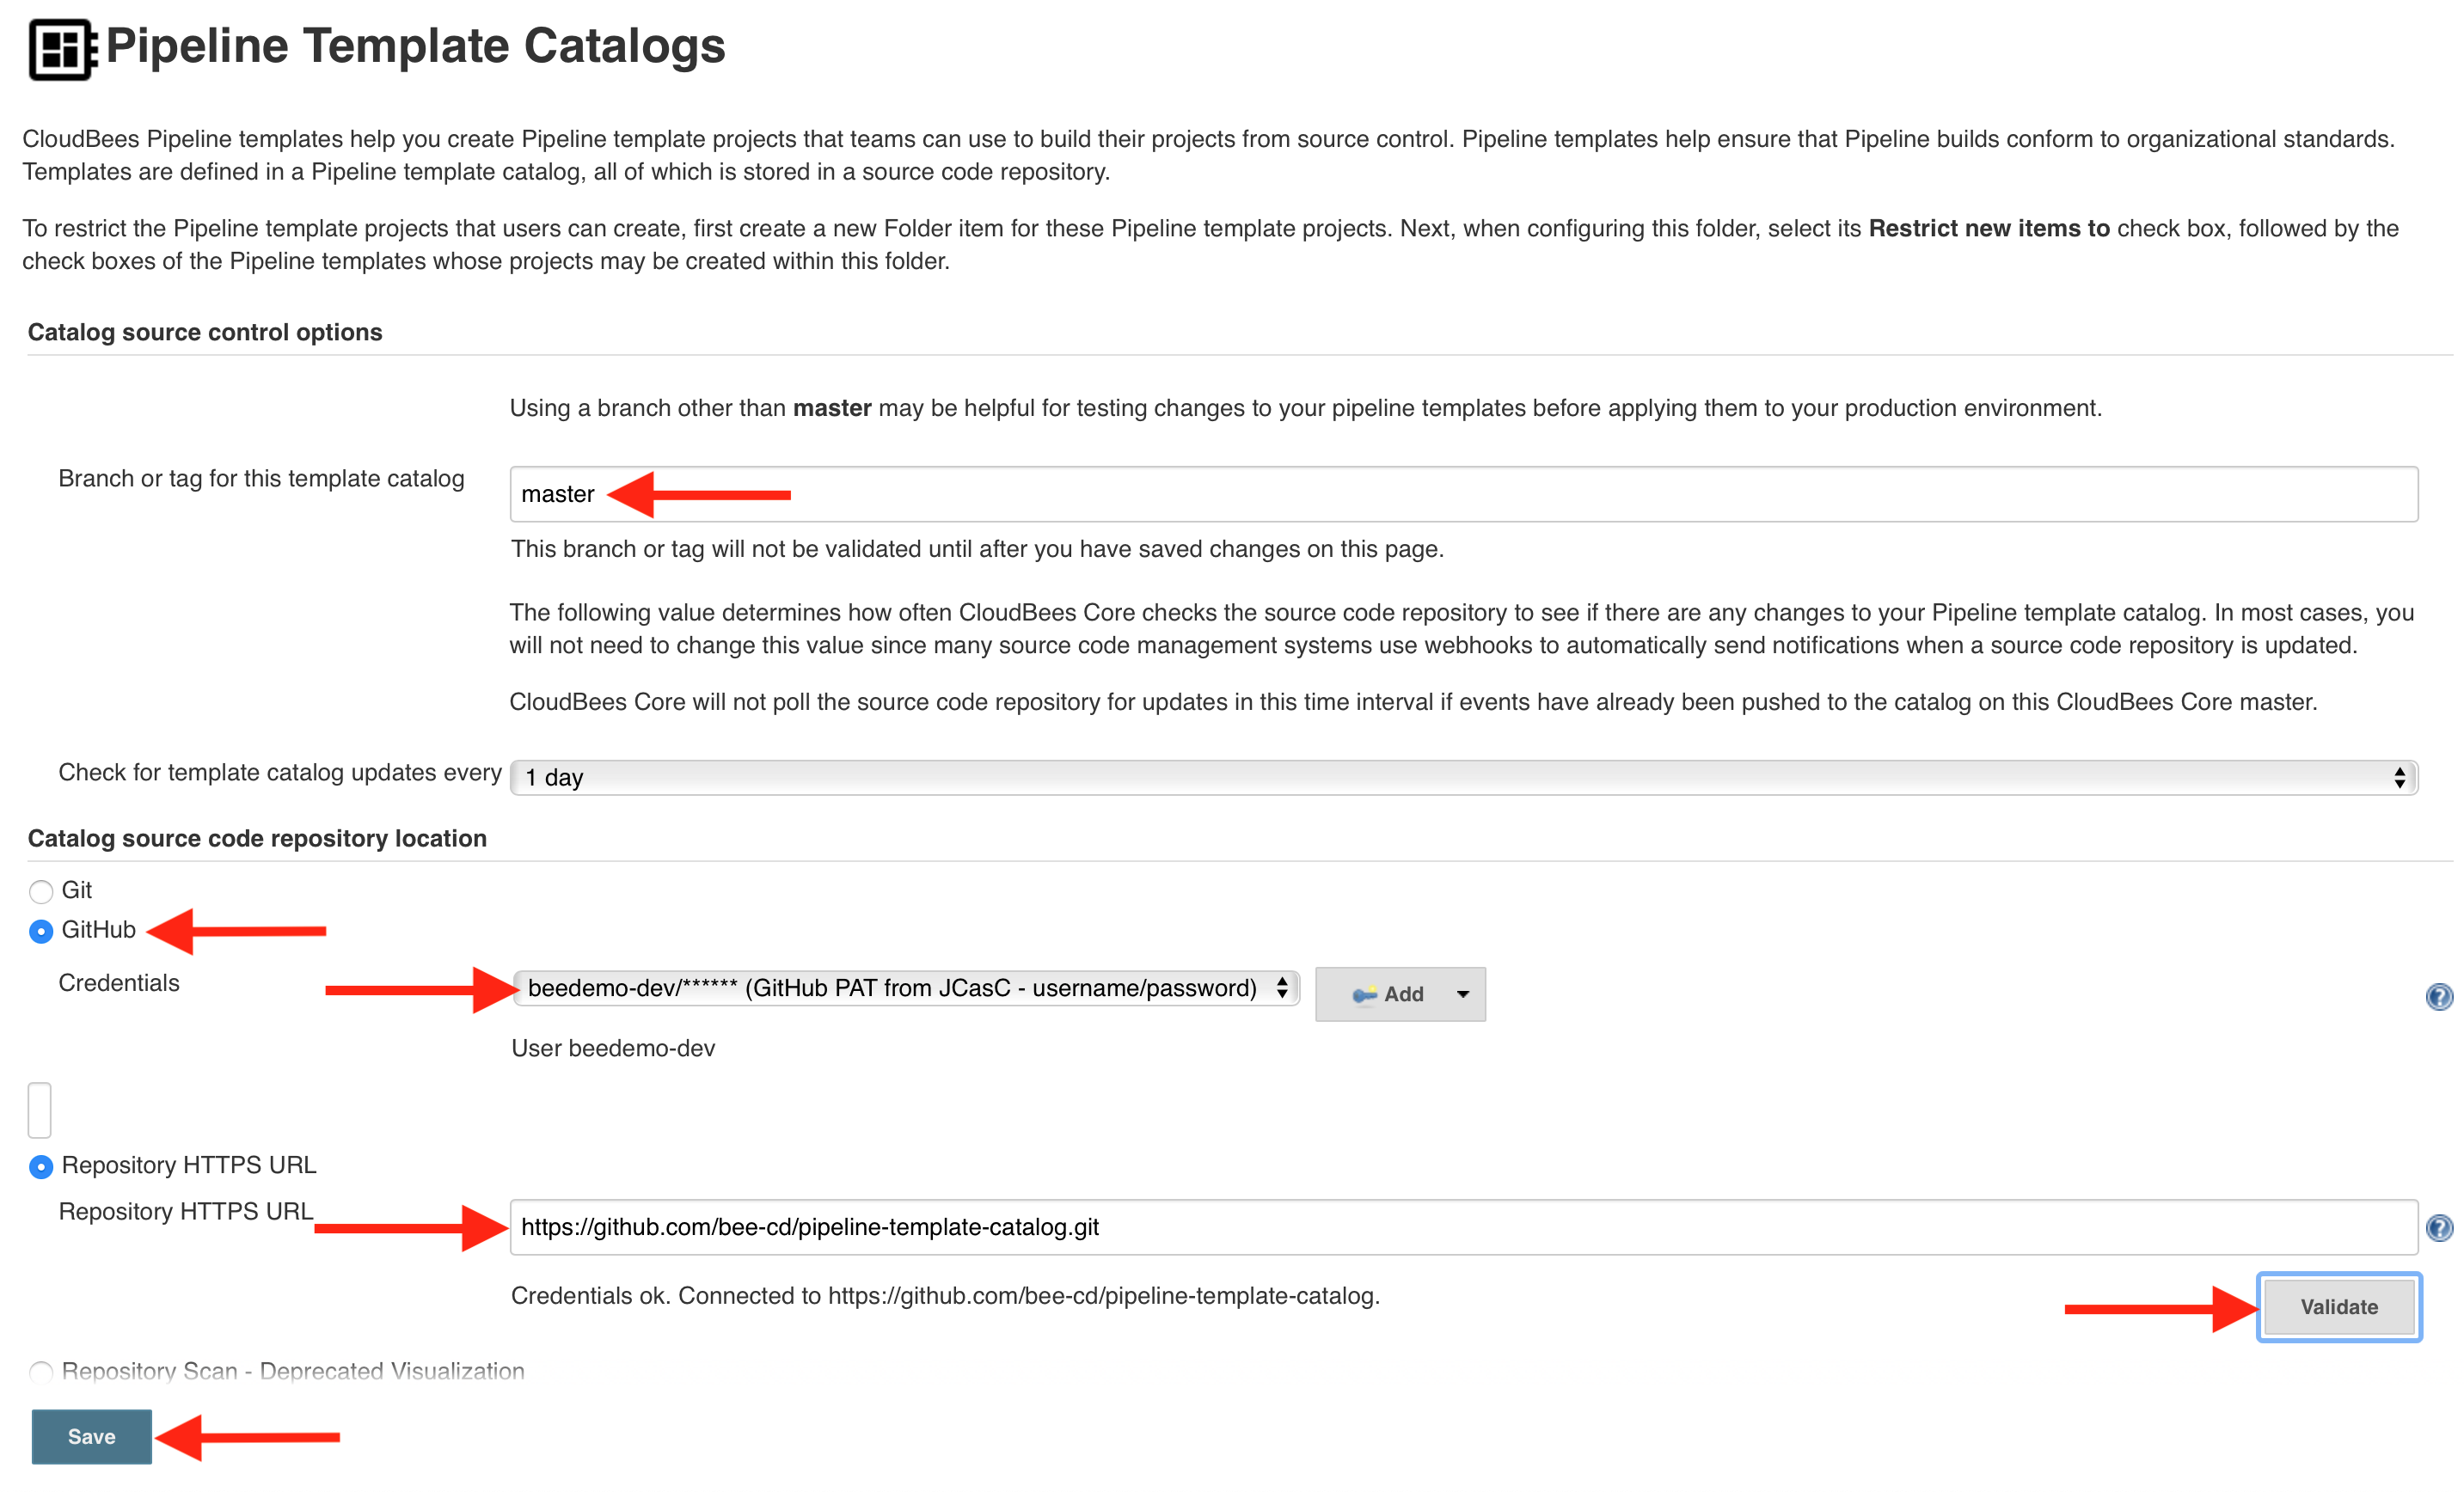
- Fill out the Catalog source control options:
- Branch or tag for this template catalog: master
- Select GitHub under Catalog source code repository location
- Credentials: select the username/password credential you created for the CloudBees CI workshop - it will show up as -
[GitHub username]/****** (GitHub PAT from JCasC - username/password) - Repository HTTPS URL: The GitHub URL for your forked copy of the pipeline-template-catalog repository. In the example below the GitHub Organization being used is bee-cd so the repository URL would be
https://github.com/bee-cd/pipeline-template-catalog.git. NOTE: You need to use the repository URL for the GitHub Organization you created for this workshop in the CloudBees CI workshop setup lab - sobee-cdwould be replaced with your GitHub Organization. - Next, click the Validate button to ensure your credentials and repository URL are set correctly. If the validation fails, please check that you selected the correct GitHub credentials and that the Repository HTTPS URL points to the fork of the pipeline-template-catalog repository in the GitHub Organization that you created for this workhsop.
- Finally, click the Save button
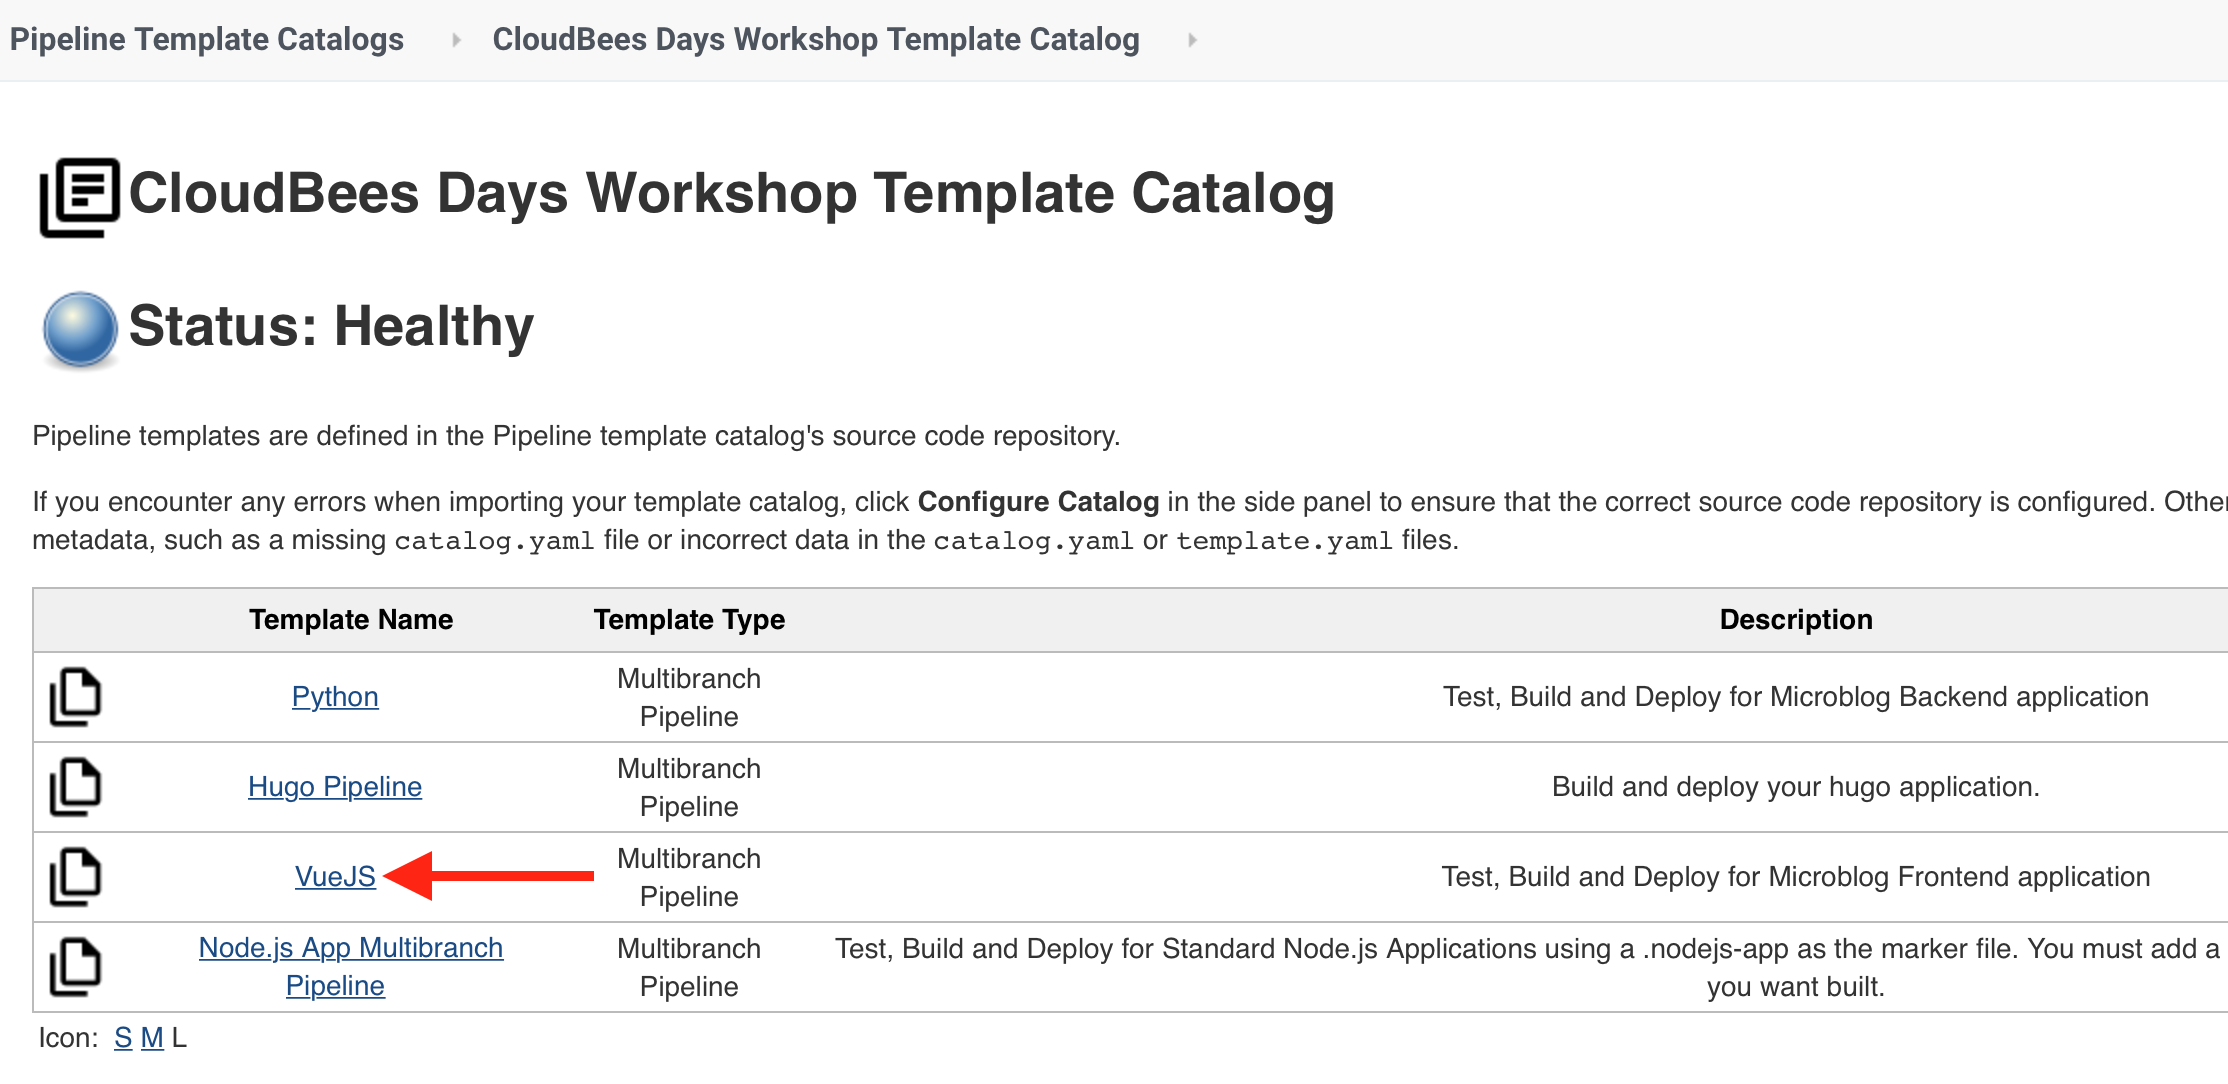
- Once the import is complete, click on the CloudBees Days Workshop Catalog link.
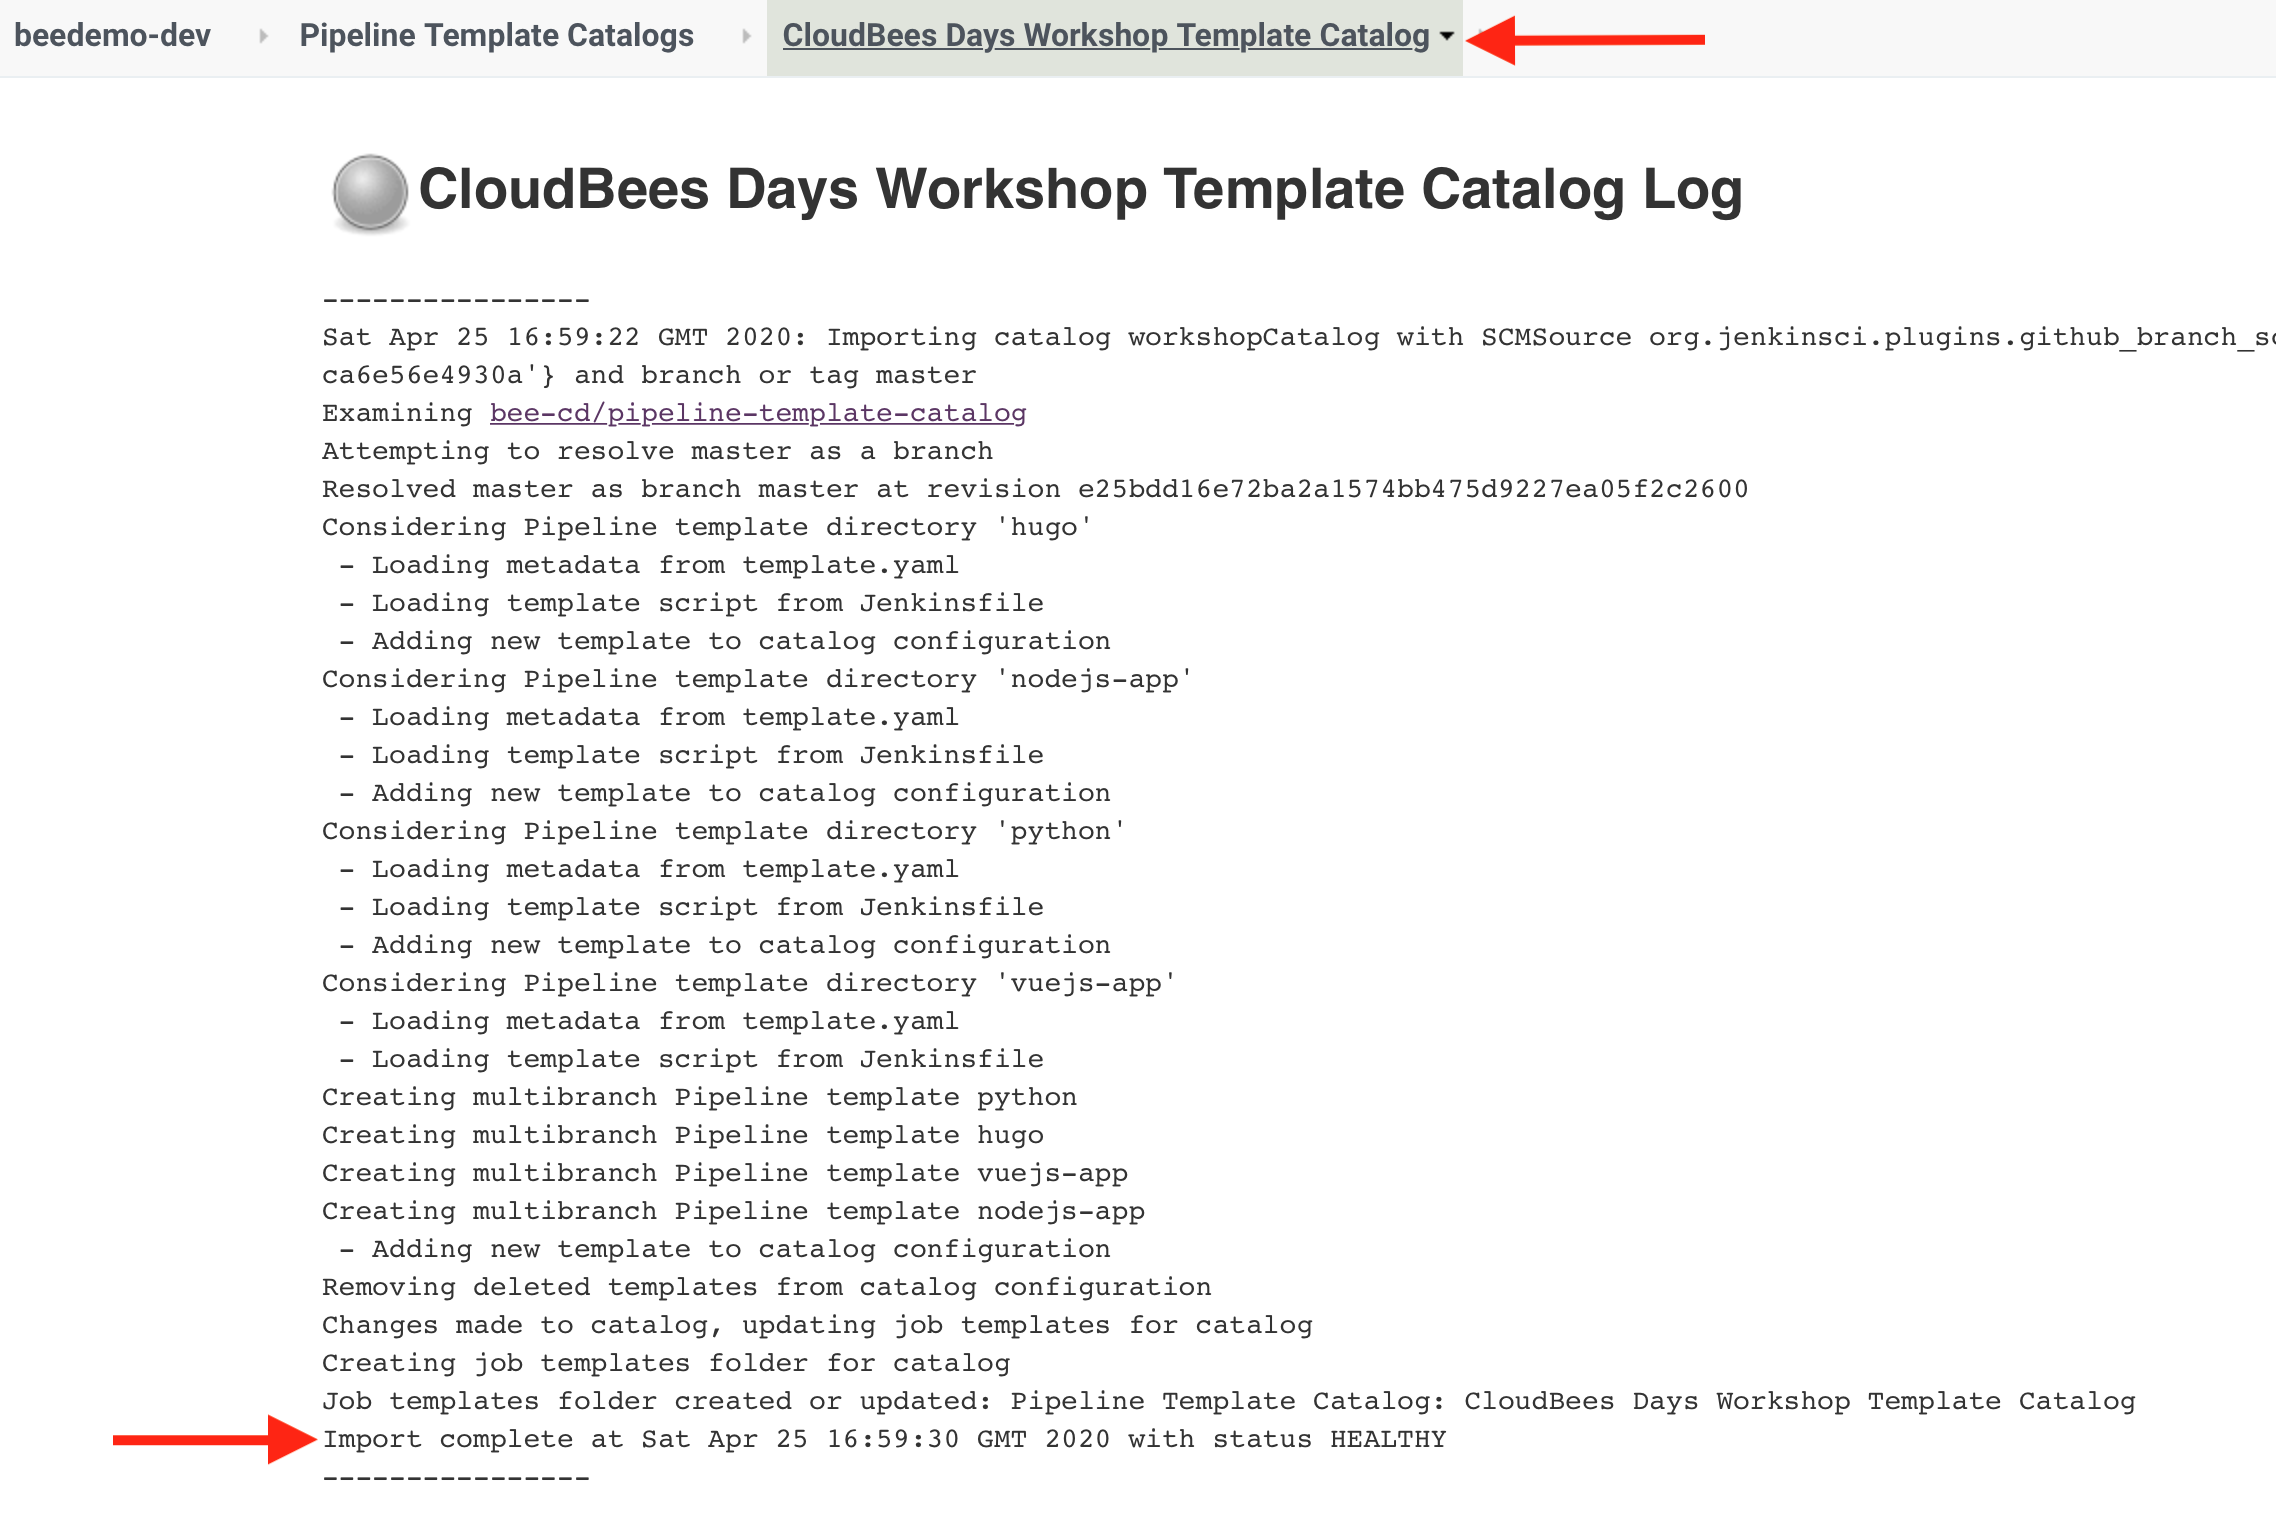
- The Pipeline Template Catalog you imported will have 4 templates to include the VueJS template which we will be using next.
- On your Team Master navigate to the folder with the same name as your Team Master (you should see the
workshop-setupPipeline job) and then click on the New Item link in the left menu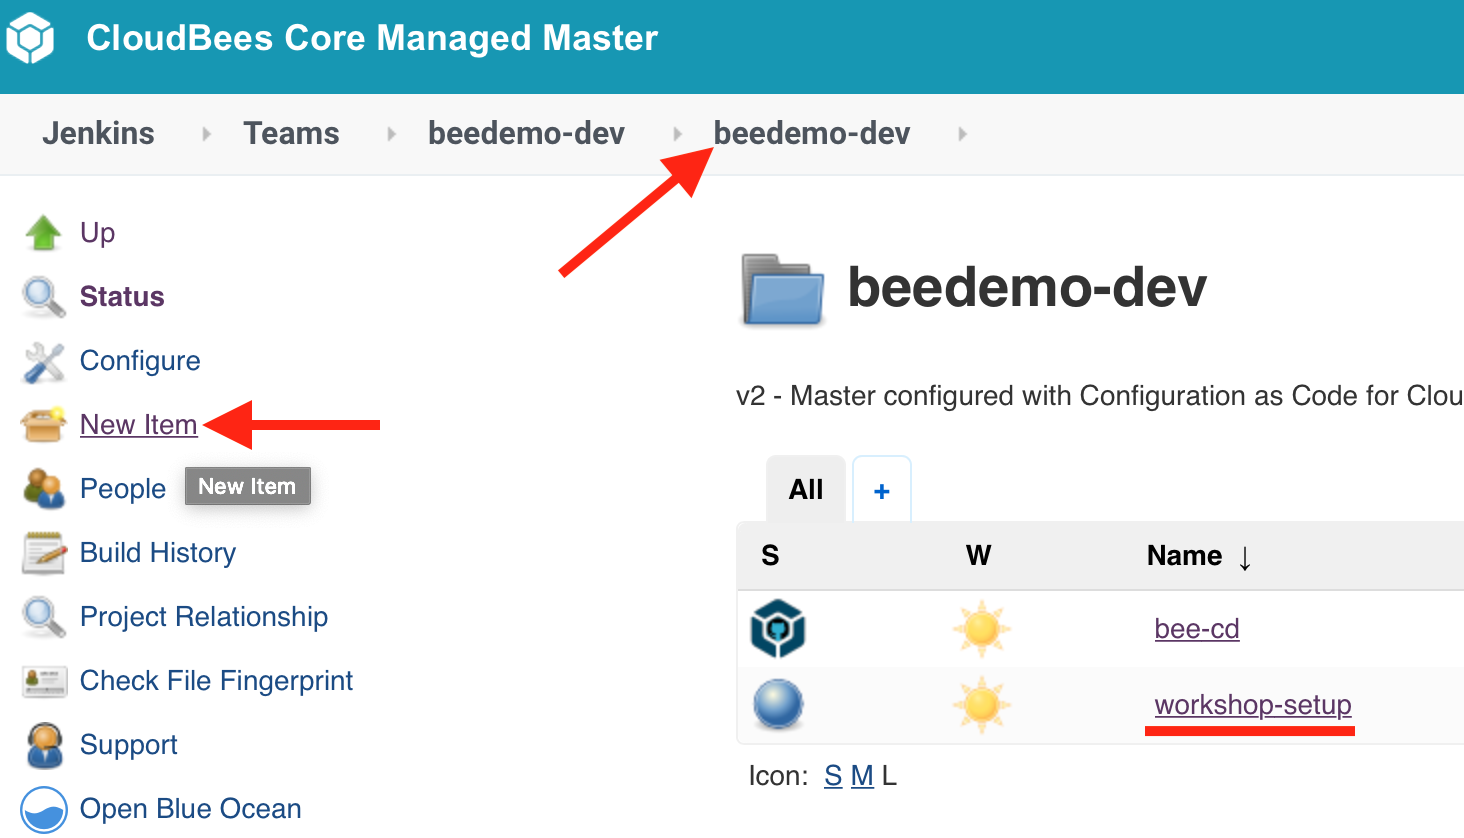
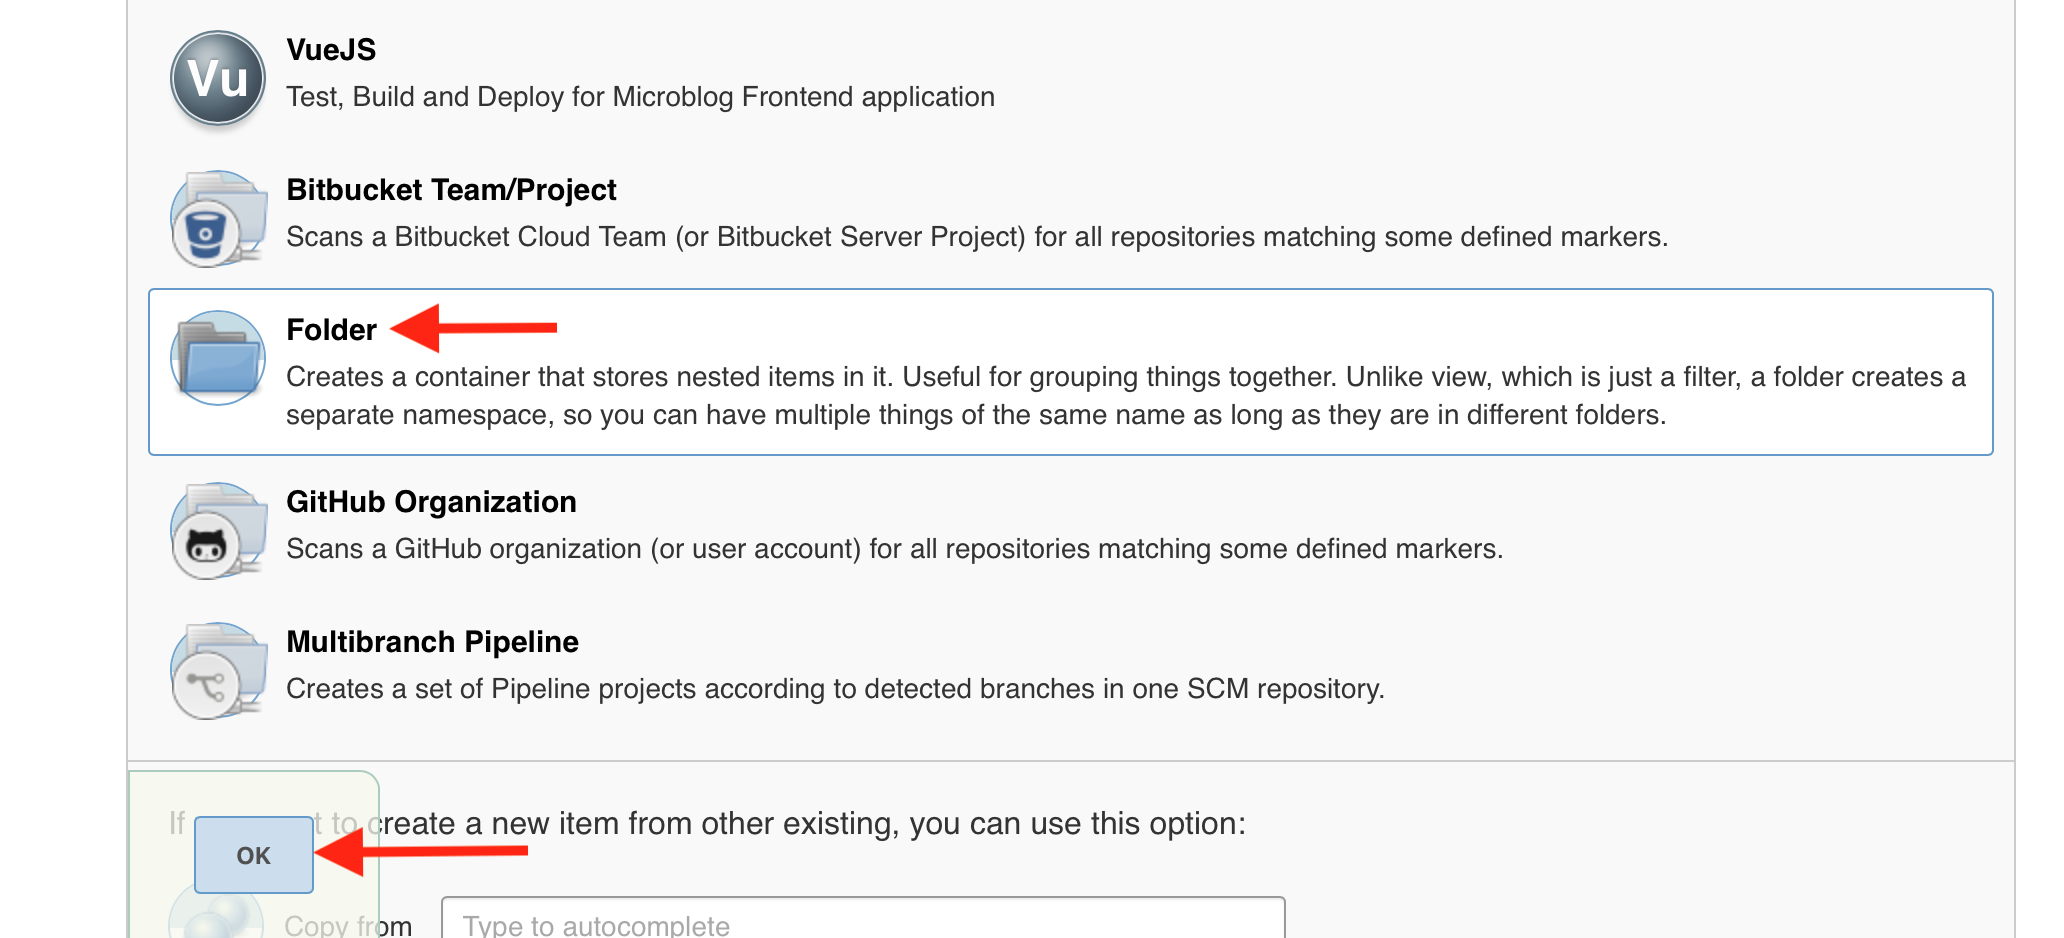
- For the item name enter template-jobs, select Folder and then click the OK button.
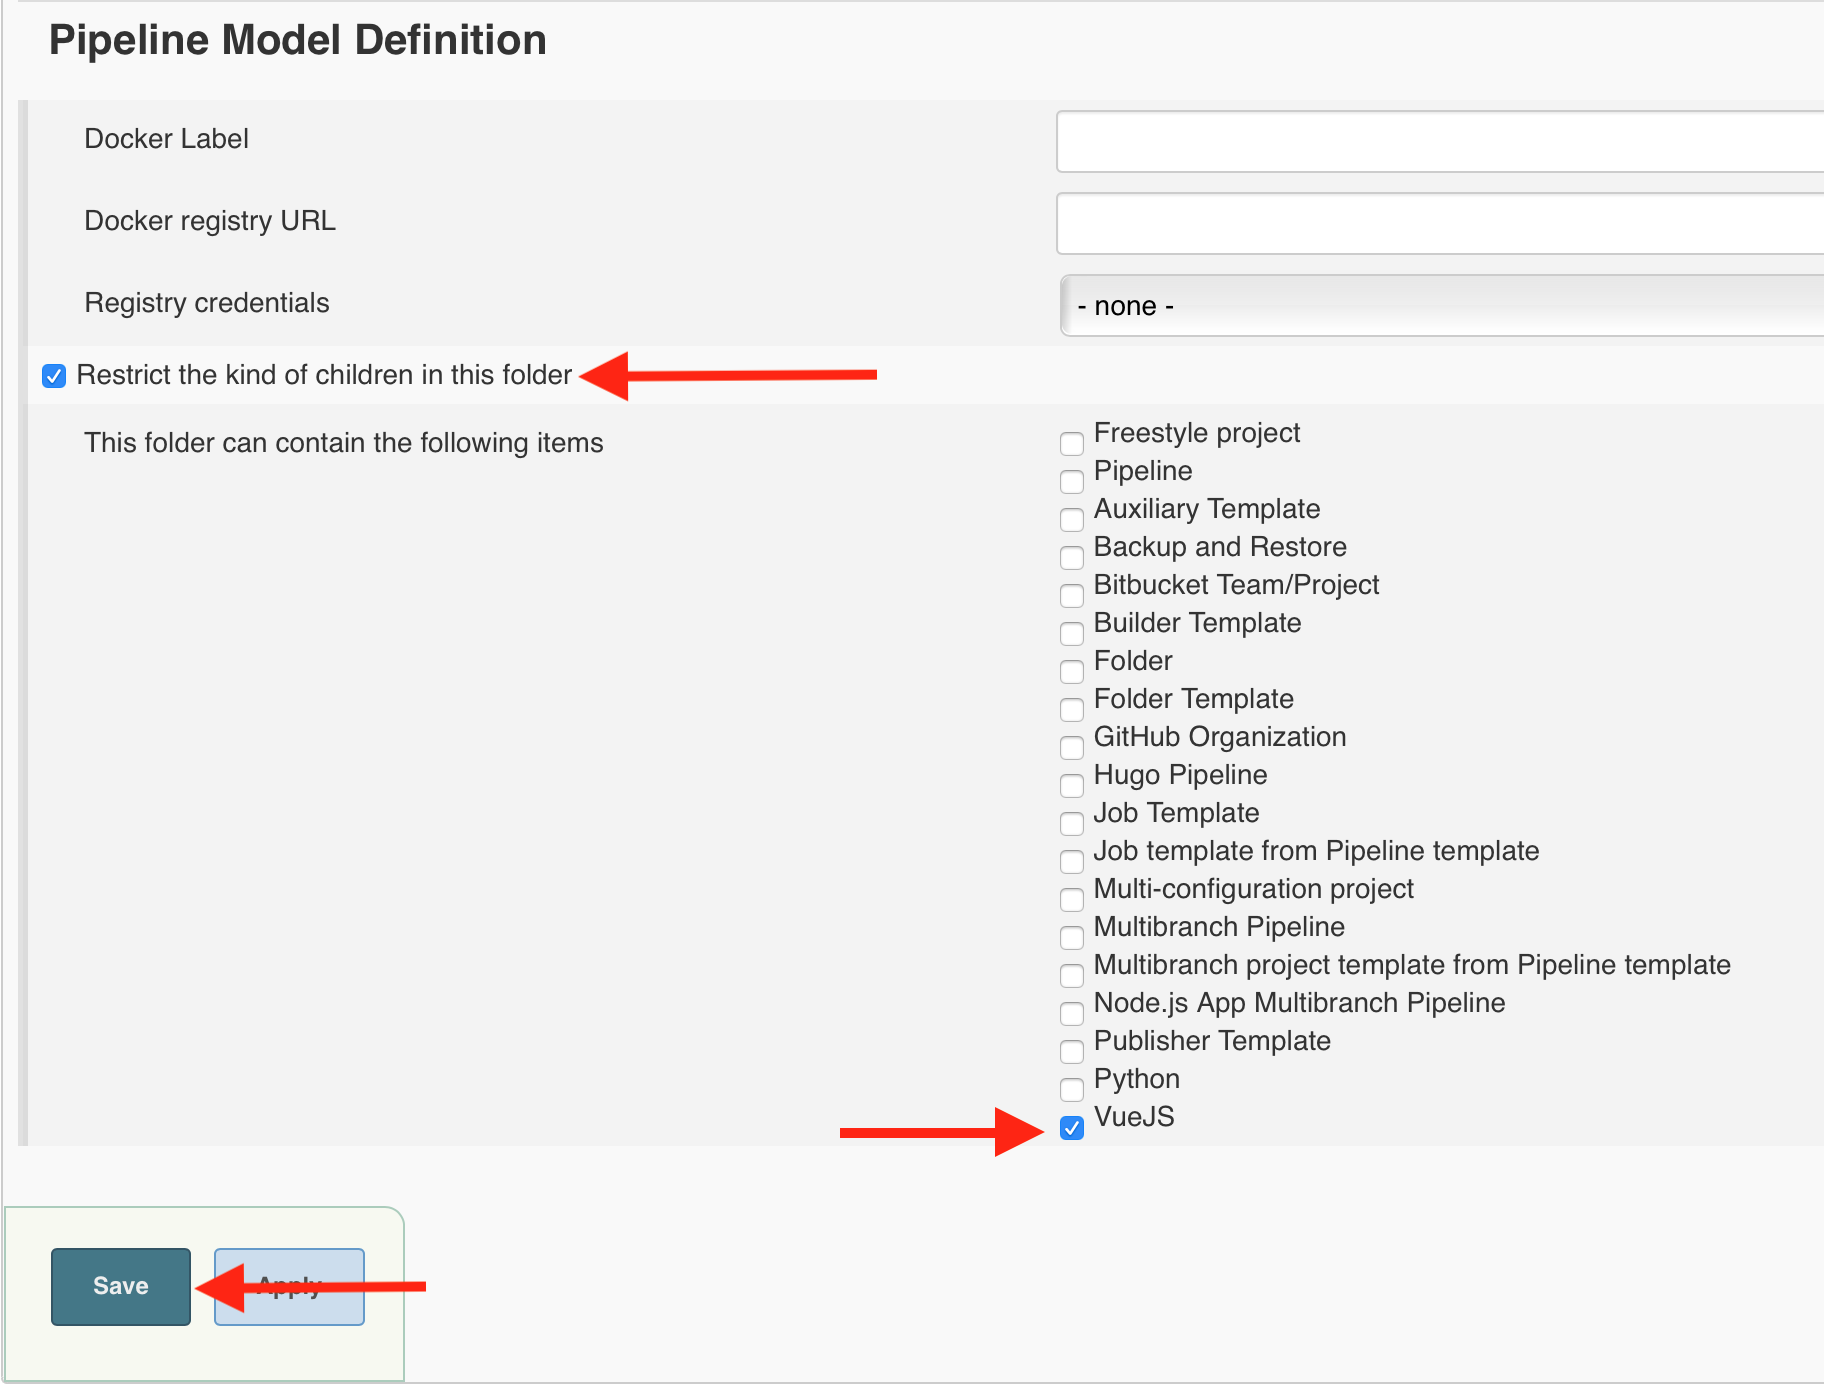
- Scroll to the bottom of the folder configuration and click on Restrict the kind of children in this folder - a CloudBees Folders Plus feature - and then select VueJS and then hit the Save button.
Create vue.js Job from Pipeline Template Catalog
In this lab you will create a new Multibranch Pipeline job from the VueJS template provided by the Pipeline Template Catalog you added above - just by filling in a few parameters.
- On your Team Master navigate into the template-jobs folder that you created in the previous lab.
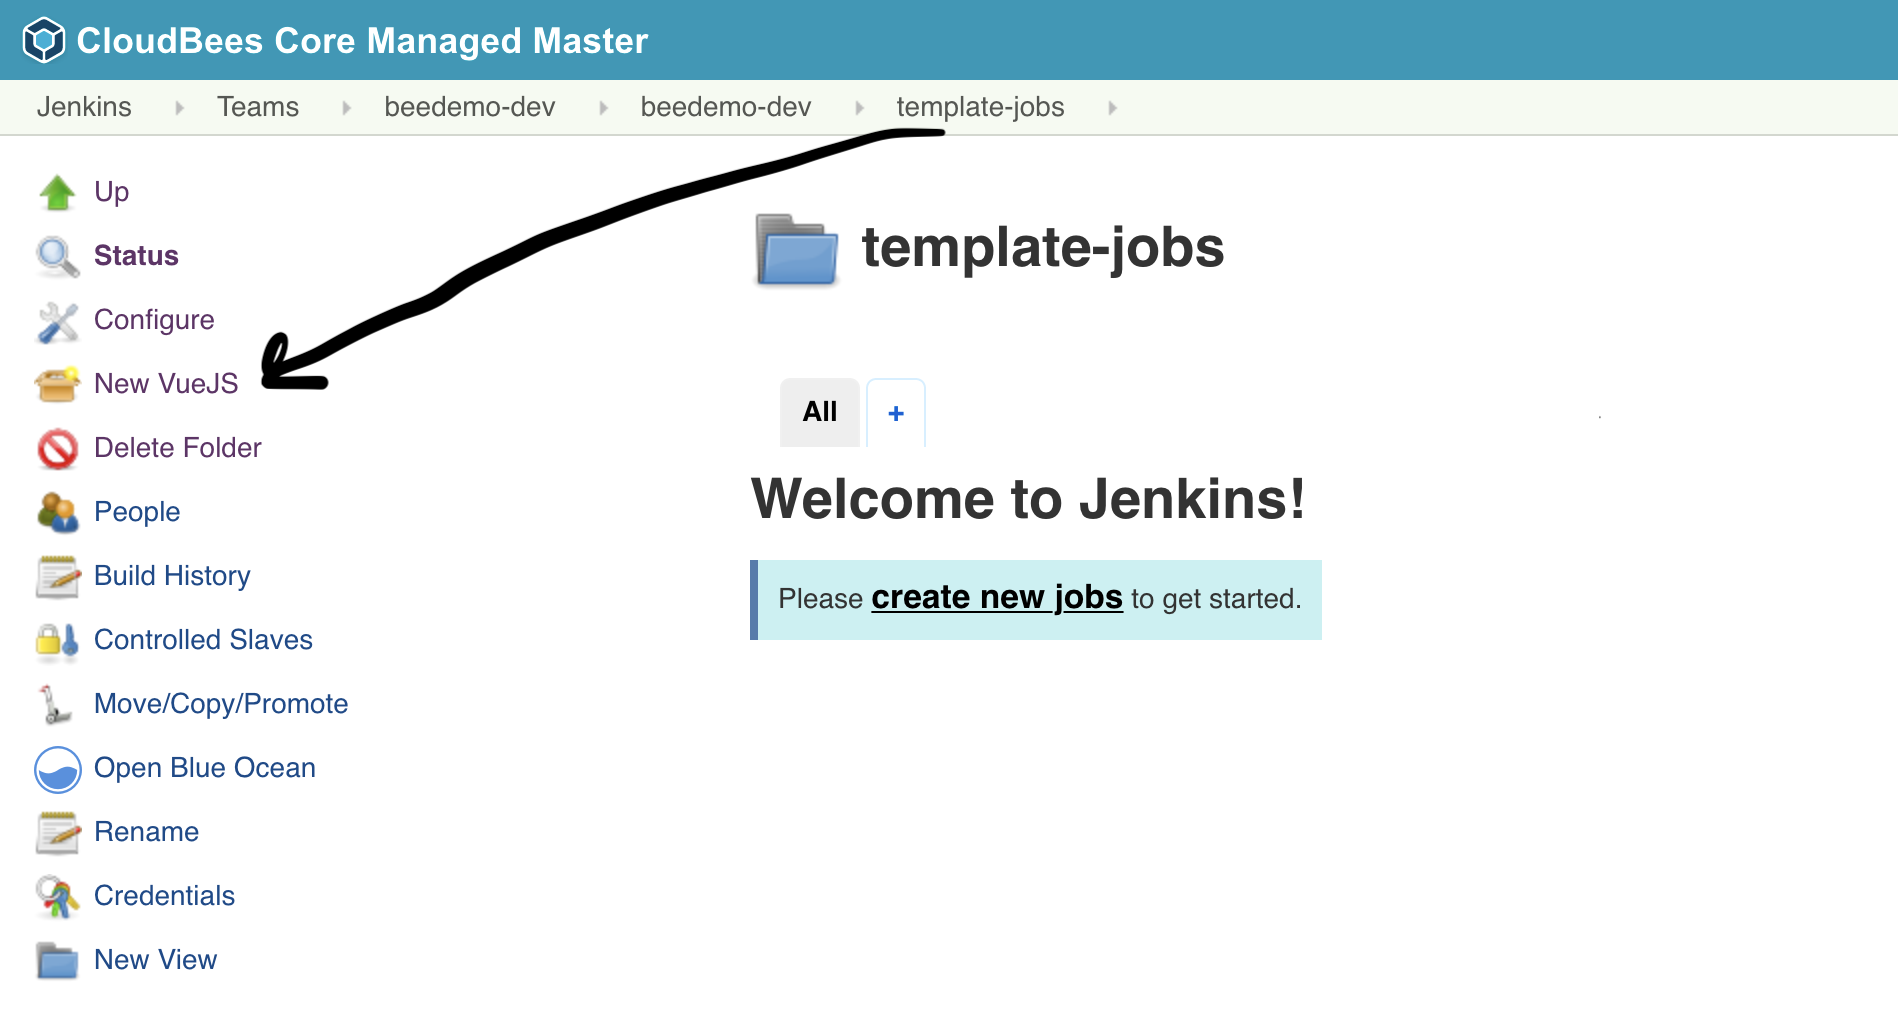
- Click on the New VueJS link in the left menu.
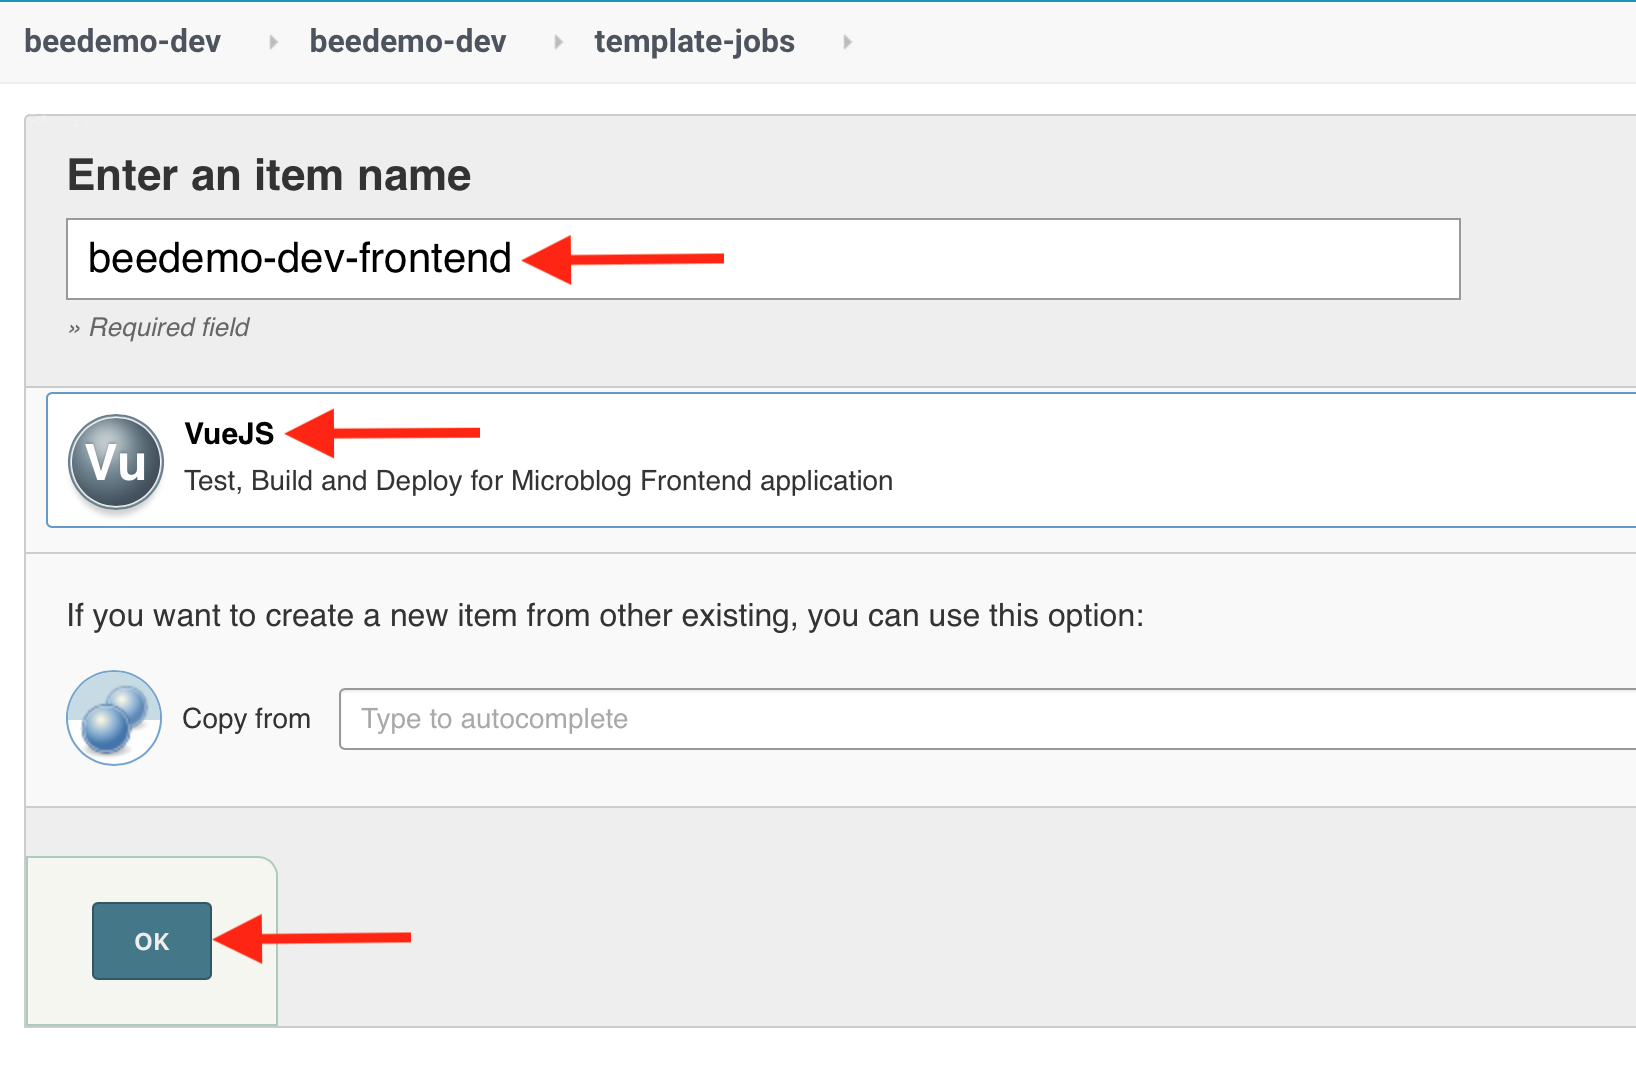
- Enter an item name as [GitHub username]-frontend, select VueJS and click the OK button.
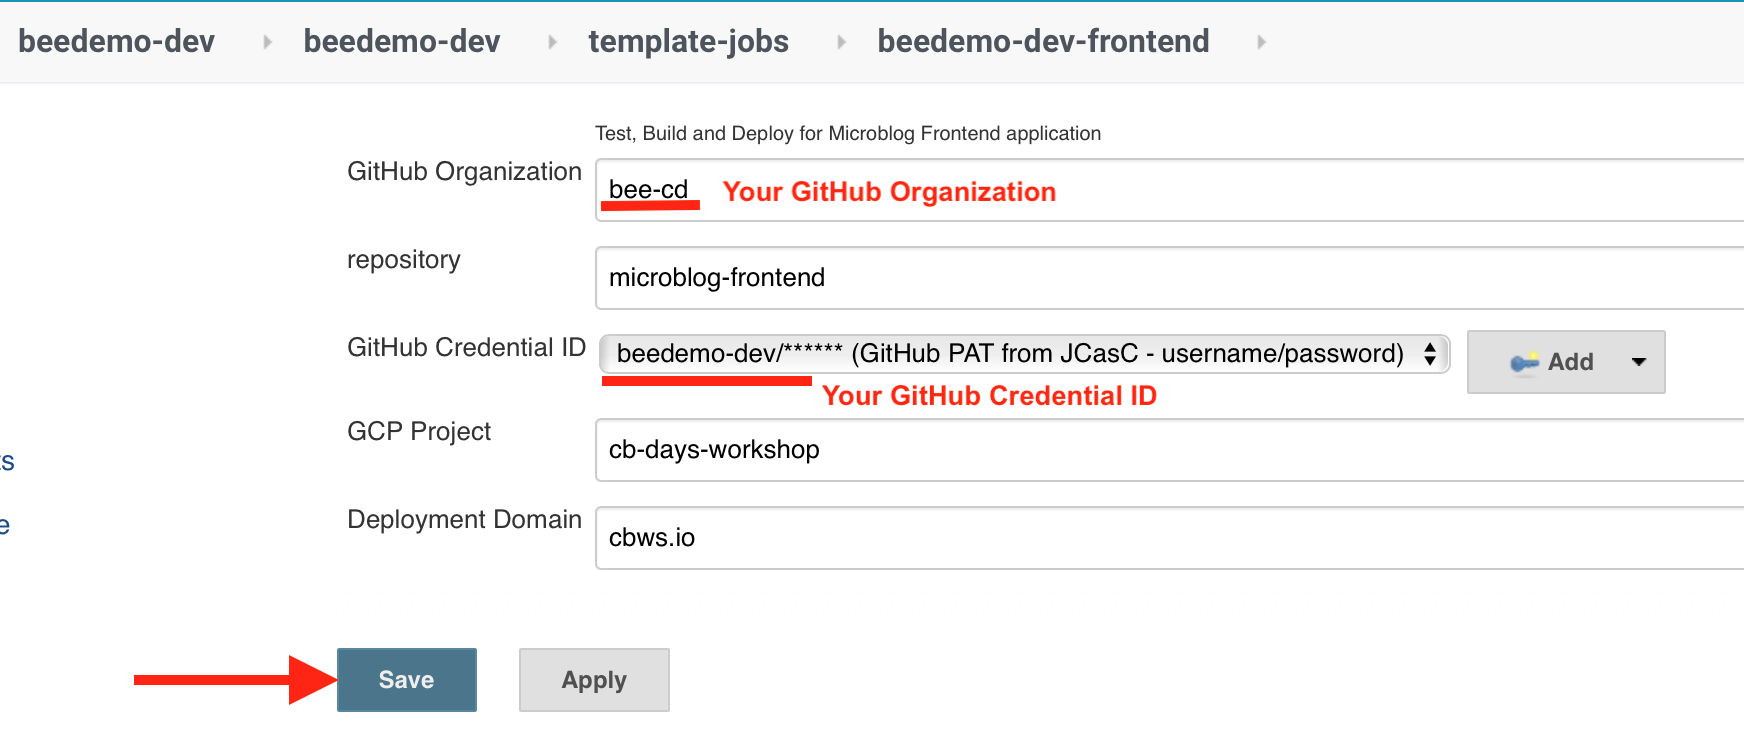
- Fill out the template parameters:
- Repository Owner: the GitHub Organization your created for the CloudBees CI workshop
- Repository: The name of your forked repository, microblog-frontend
- GitHub Credential ID: select the username/password credential created for you by the workshop-setup job and CloudBees CI CasC - it will show up as - [GitHub username]/******
- Click the Save button
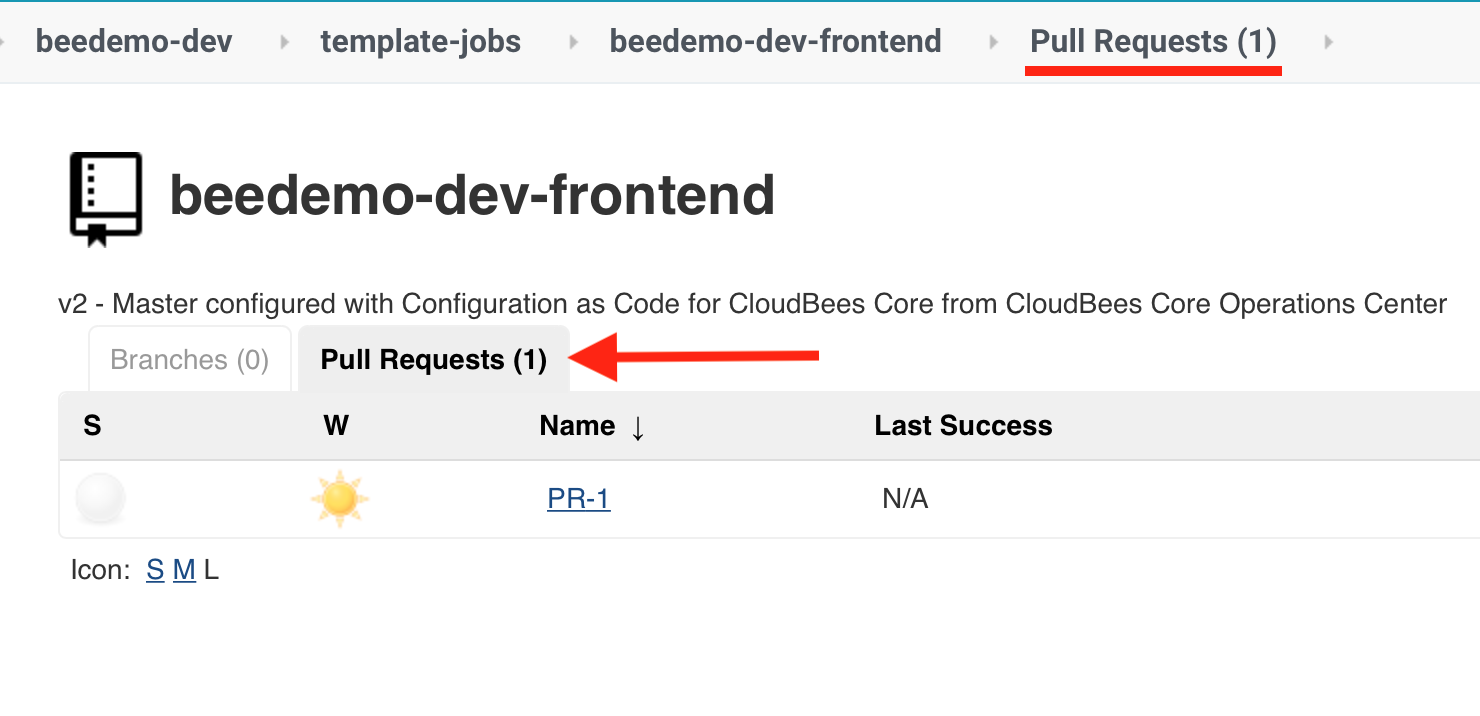
- After the initial scan you will see one Jenkins Pipeline job funder the Pull Requests tab of the Pipeline Mulitbranch project that was just created for your fork of the microblog-frontend repository - PR-1.
- Now, in GitHub, navigate to the Add marker file pull request (#1) in your fork of the microblog-frontend repository.

- Click on the pull request, scroll down to the pull request checks and you will see the stage level status of the Pipeline. Here you see that the VueJS Tests
stagehas started.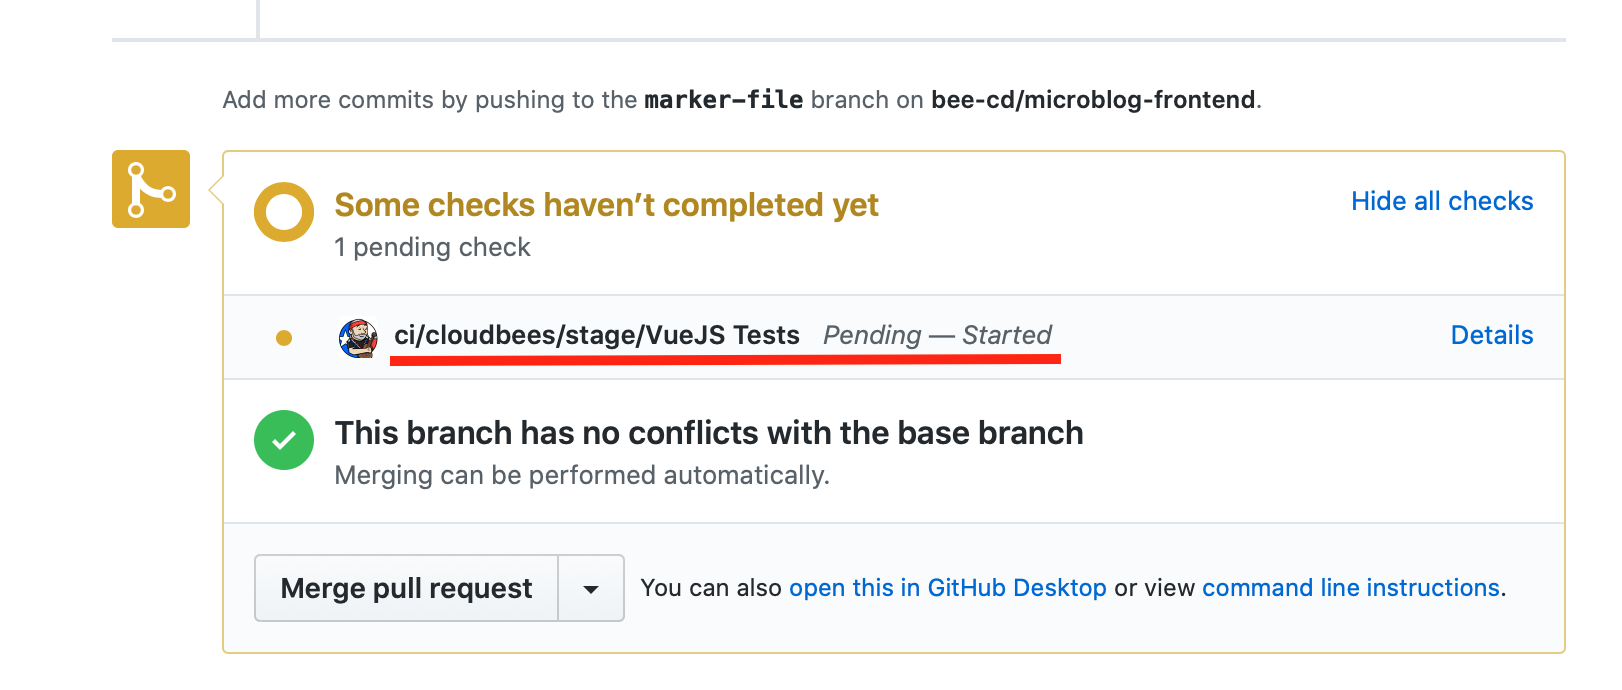
- Once the Pipeline finishes you will see that all the checks failed on the pull request in GitHub. Clicking on the Details link of the ci/cloudbees/error check will take you directly to the build logs with the error in your Team Master.
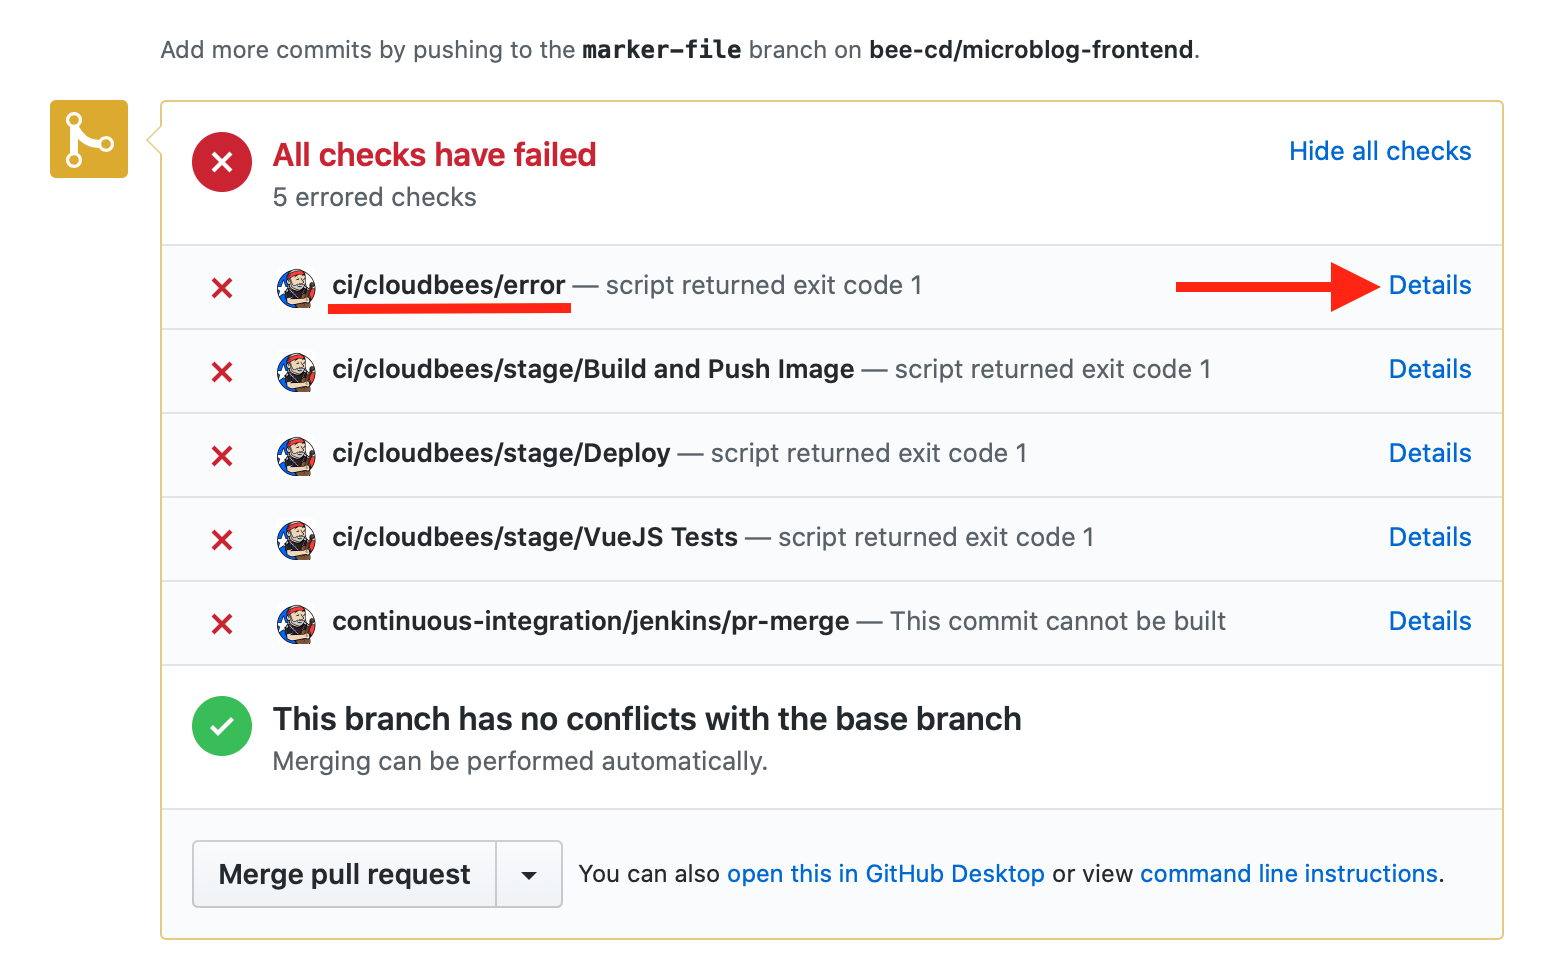
- The logs show us that a test in
tests/unit/Posts.spec.jsfailed - a typo where the word function was mis-typed as funcion.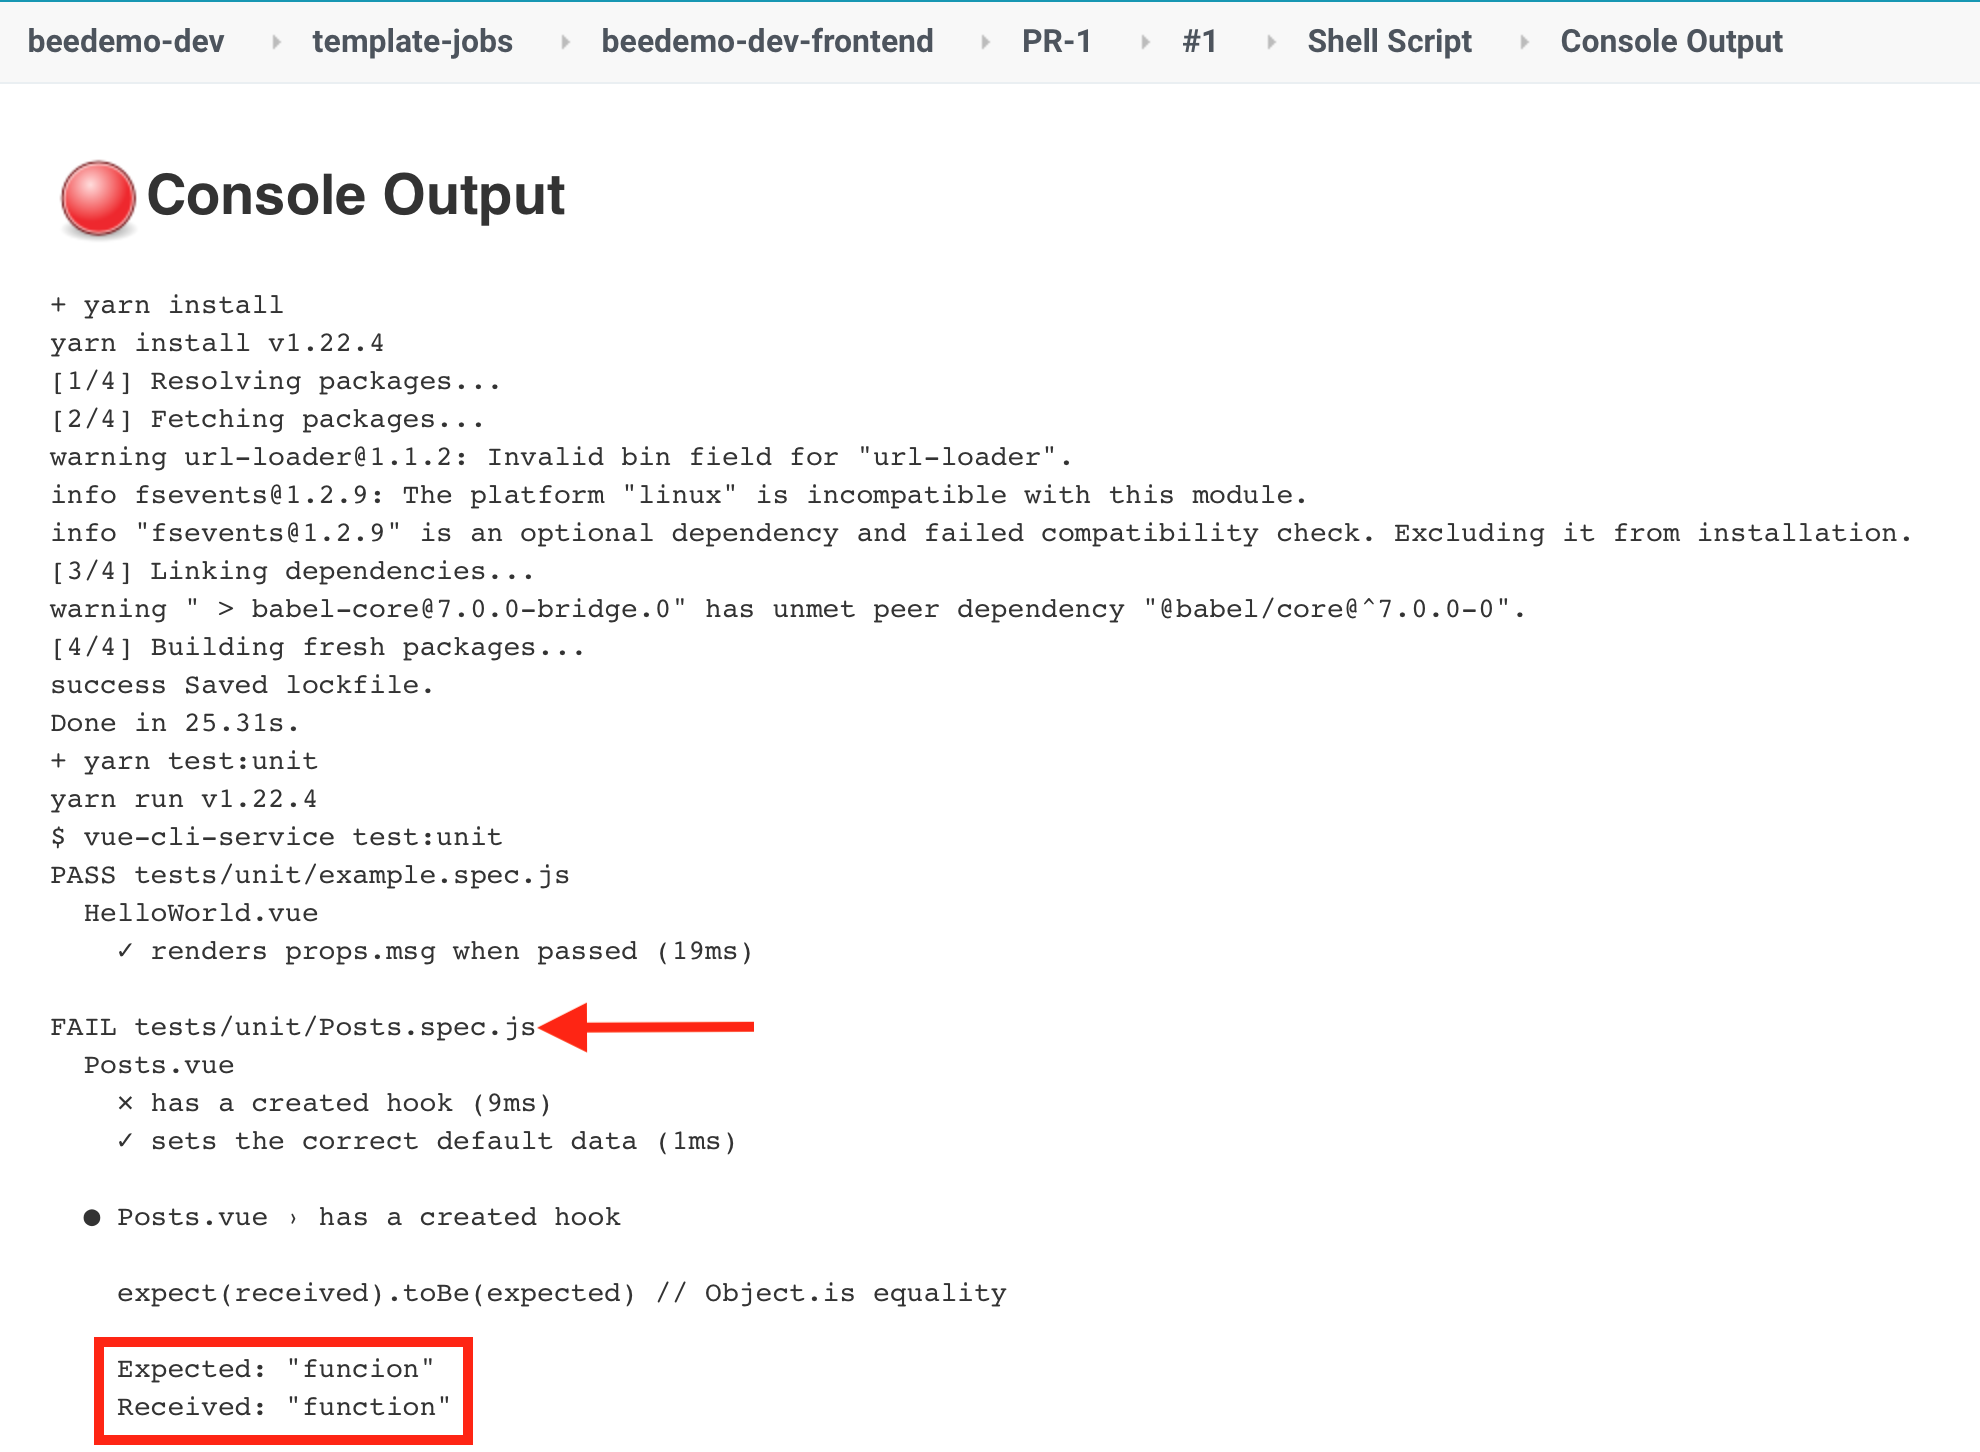
- In GitHub, navigate back to the Add marker file pull request for your forked microblog-frontend repository, click on the Files changed tab and then click on the context menu for the
tests/unit/Posts.spec.jsfile and select Edit file.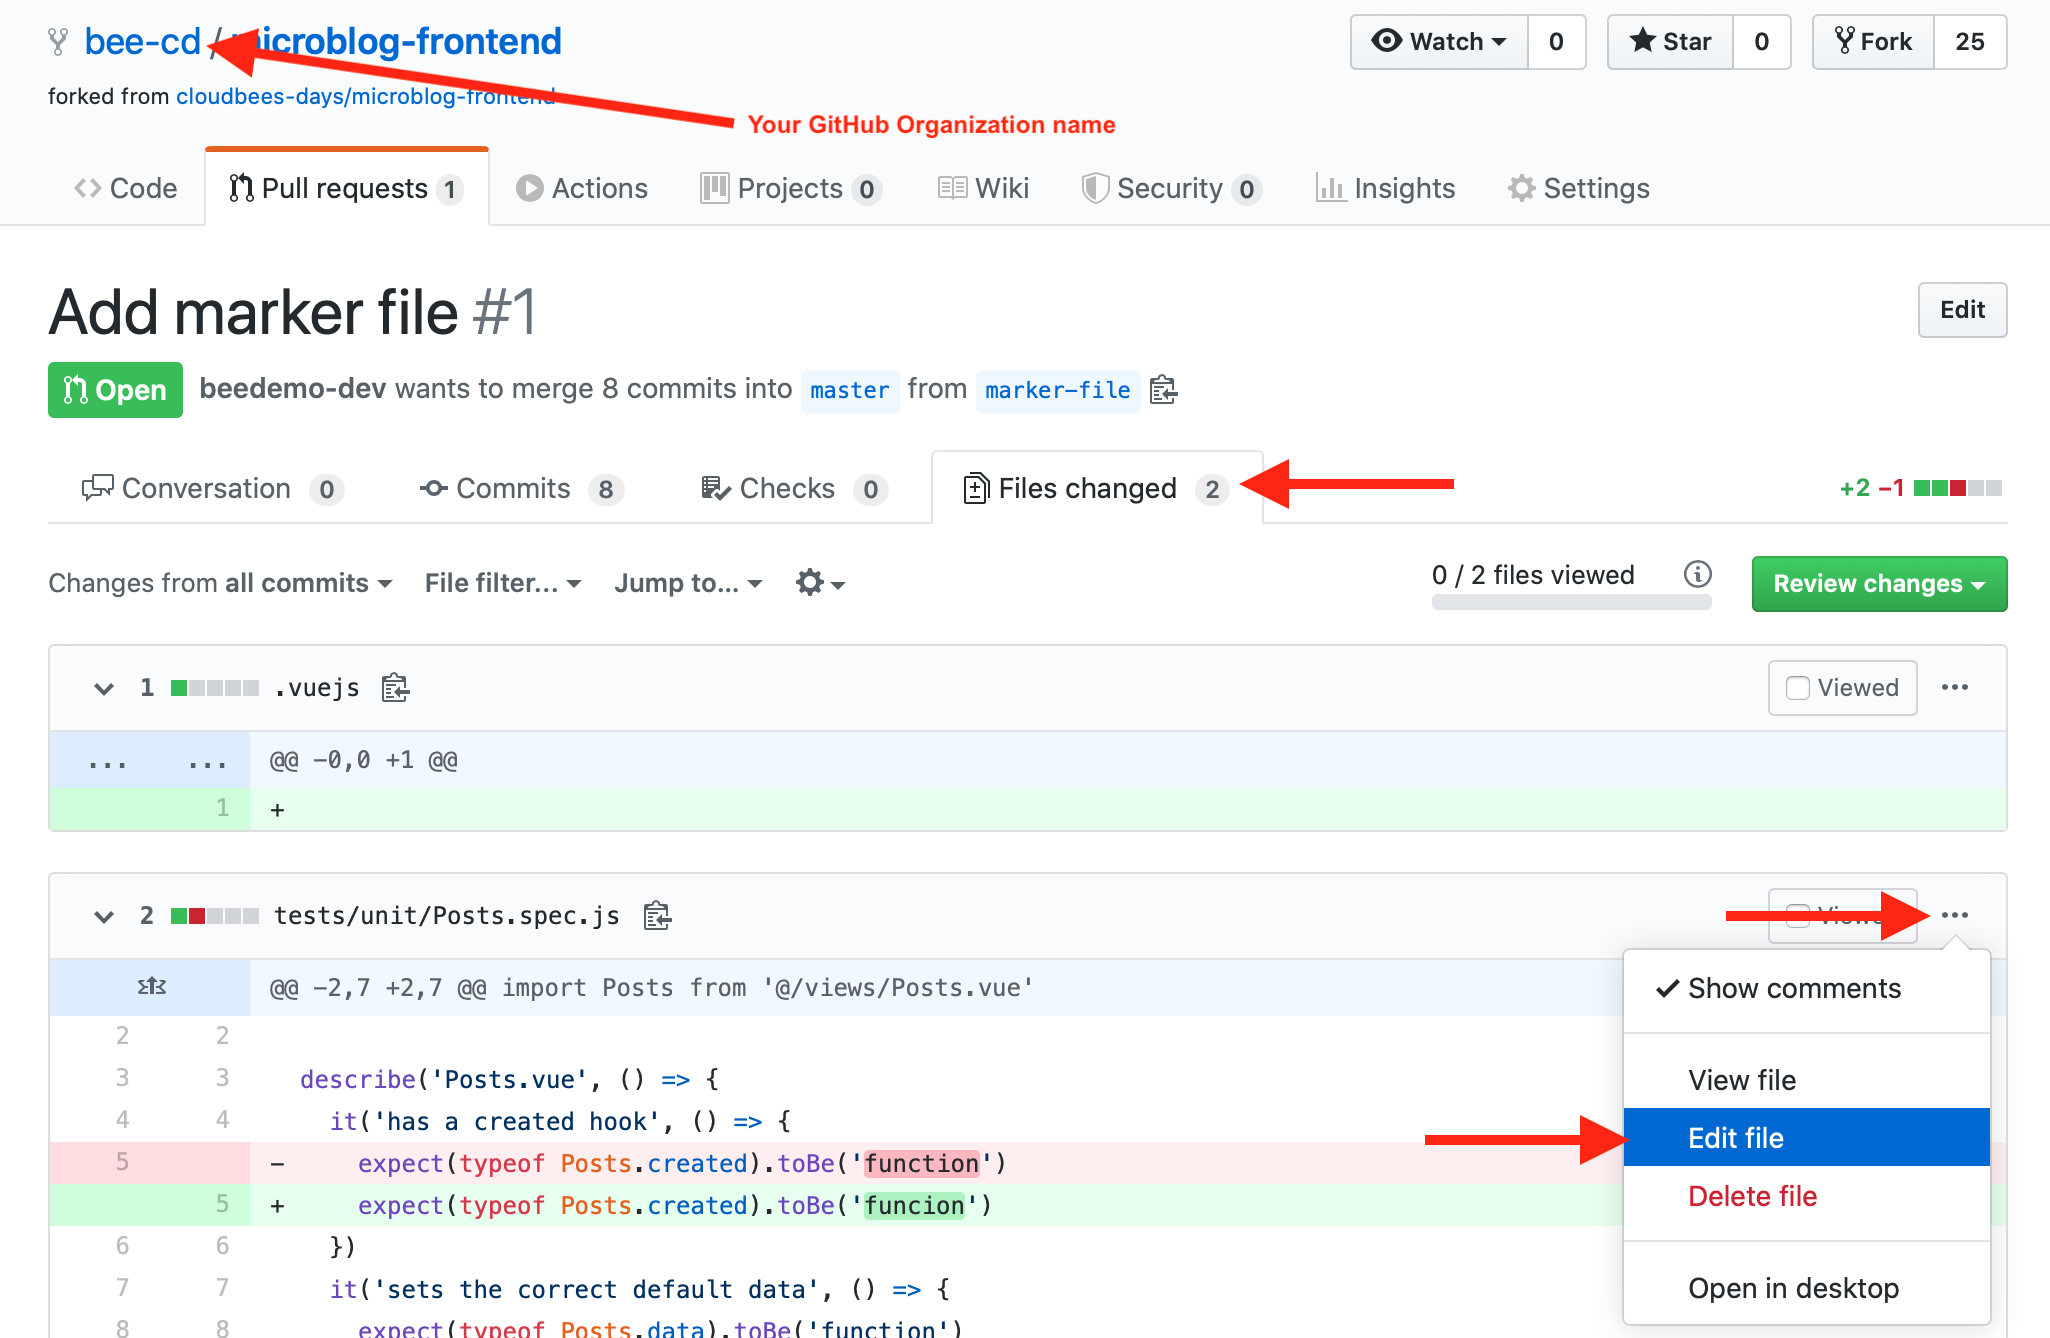
- In the GitHub editor for the
tests/unit/Posts.spec.jsfile fix the typo changing funcion to function, and then click the Commit changes button to commit the changes to the marker-file branch of your forked microblog-frontend repository.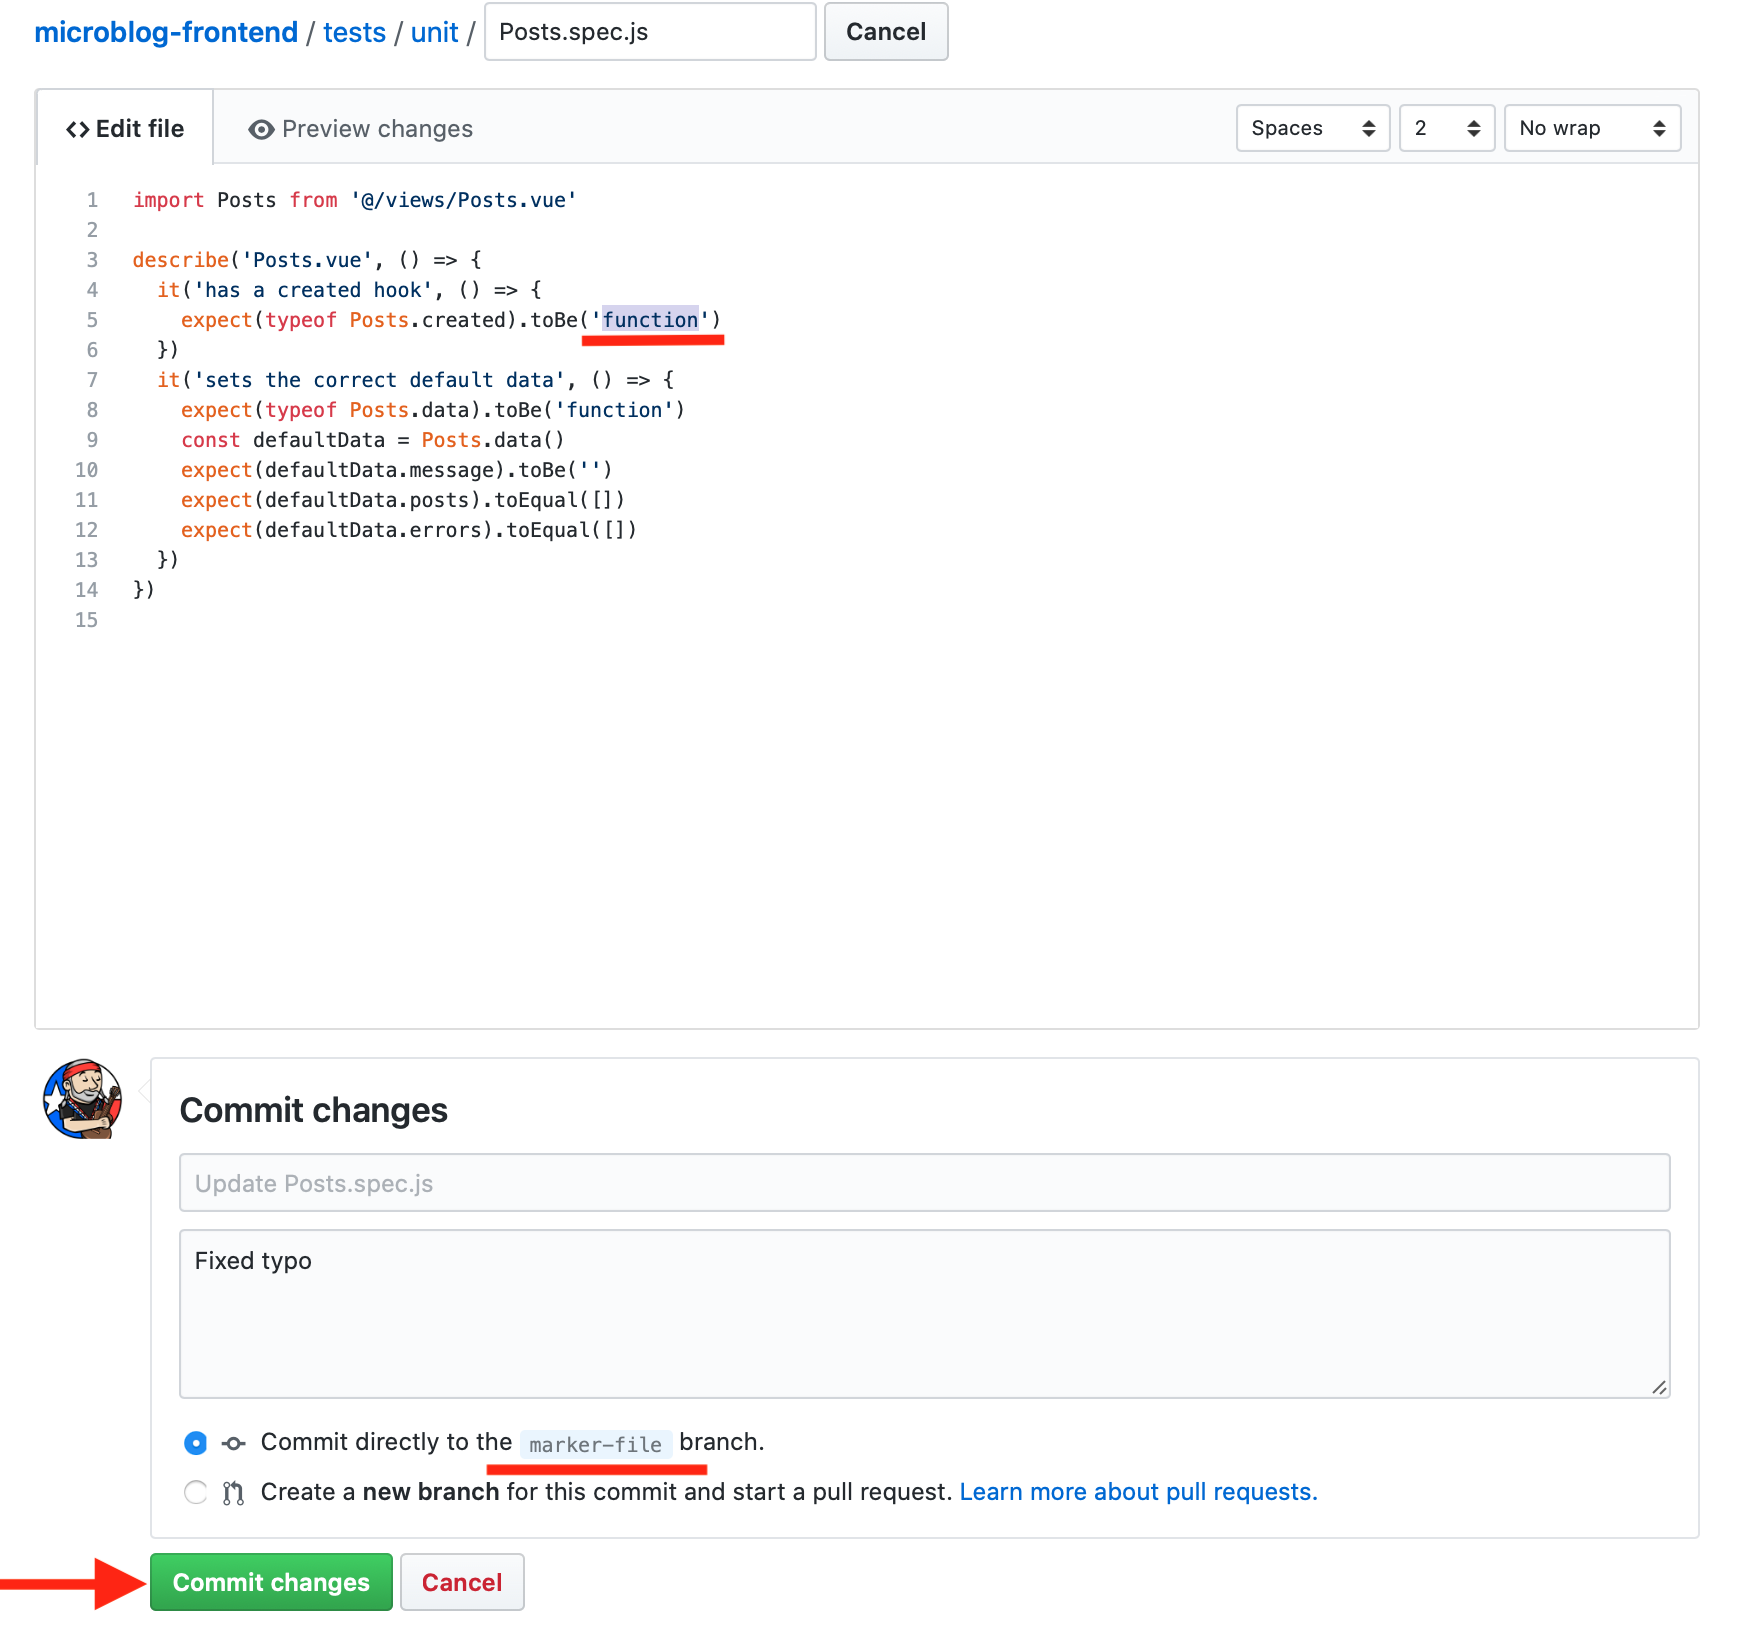
- Finally, on the pull request page for your Add marker file pull request click on the Conversation tab and scroll down to the pull request checks. After the PR-1 pipeline job completes you will see that all the checks are now successful, scroll to the bottom and click the green Merge pull request button and then the Confirm merge button to merge the pull request to your master branch.
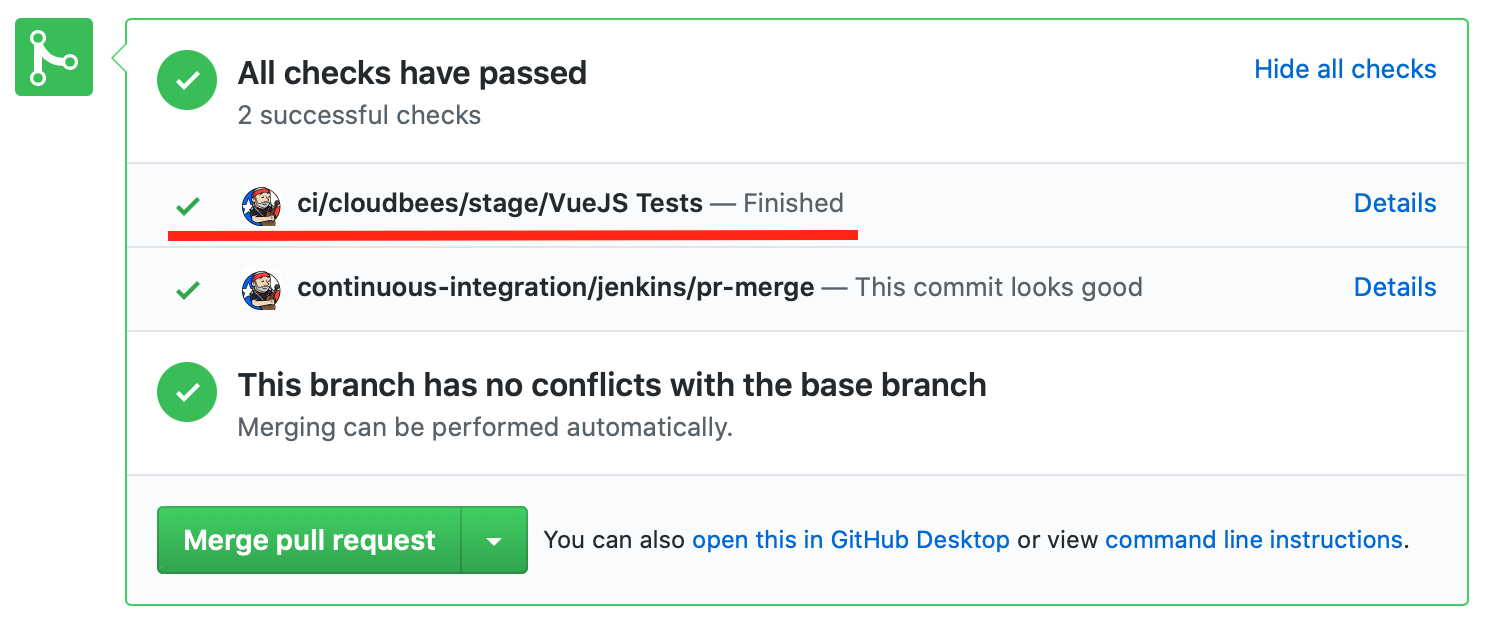
For instructor led workshops please returns to the workshop slides.
Otherwise, you may proceed to the next lab: CloudBees Pipeline Policies or choose another lab on the Main Lab Page.